Analyzing the Performance of Your Welcome Series

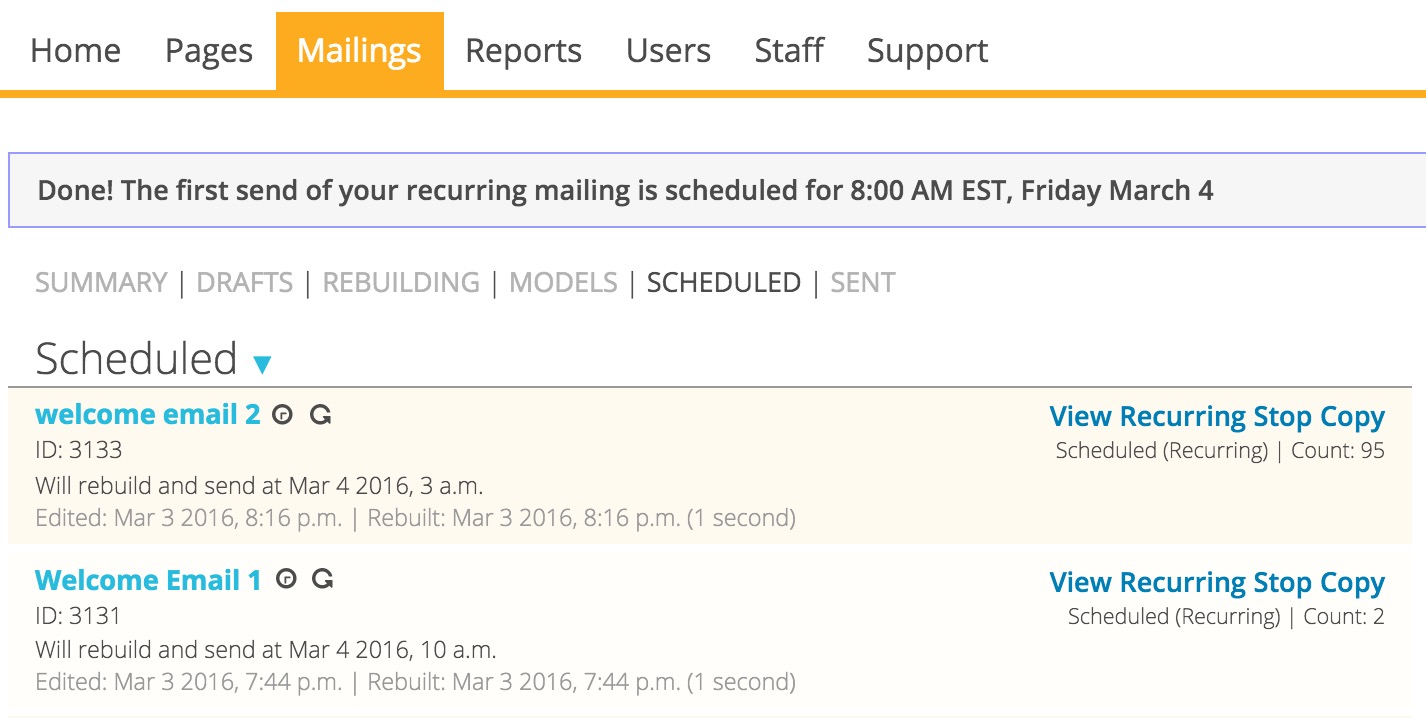
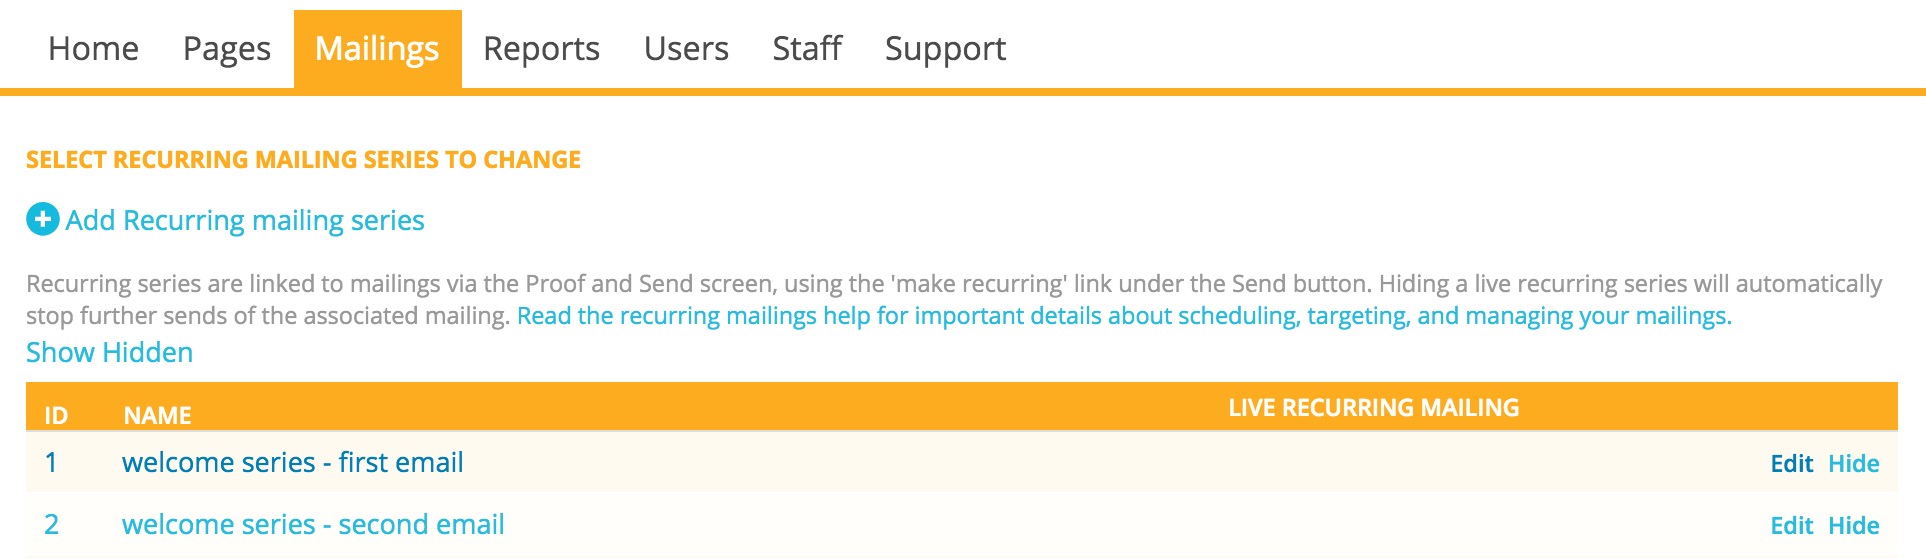
1. Click on the Mailings tab and scroll down to Sent Mailings. Click on a sent recurring mailing.
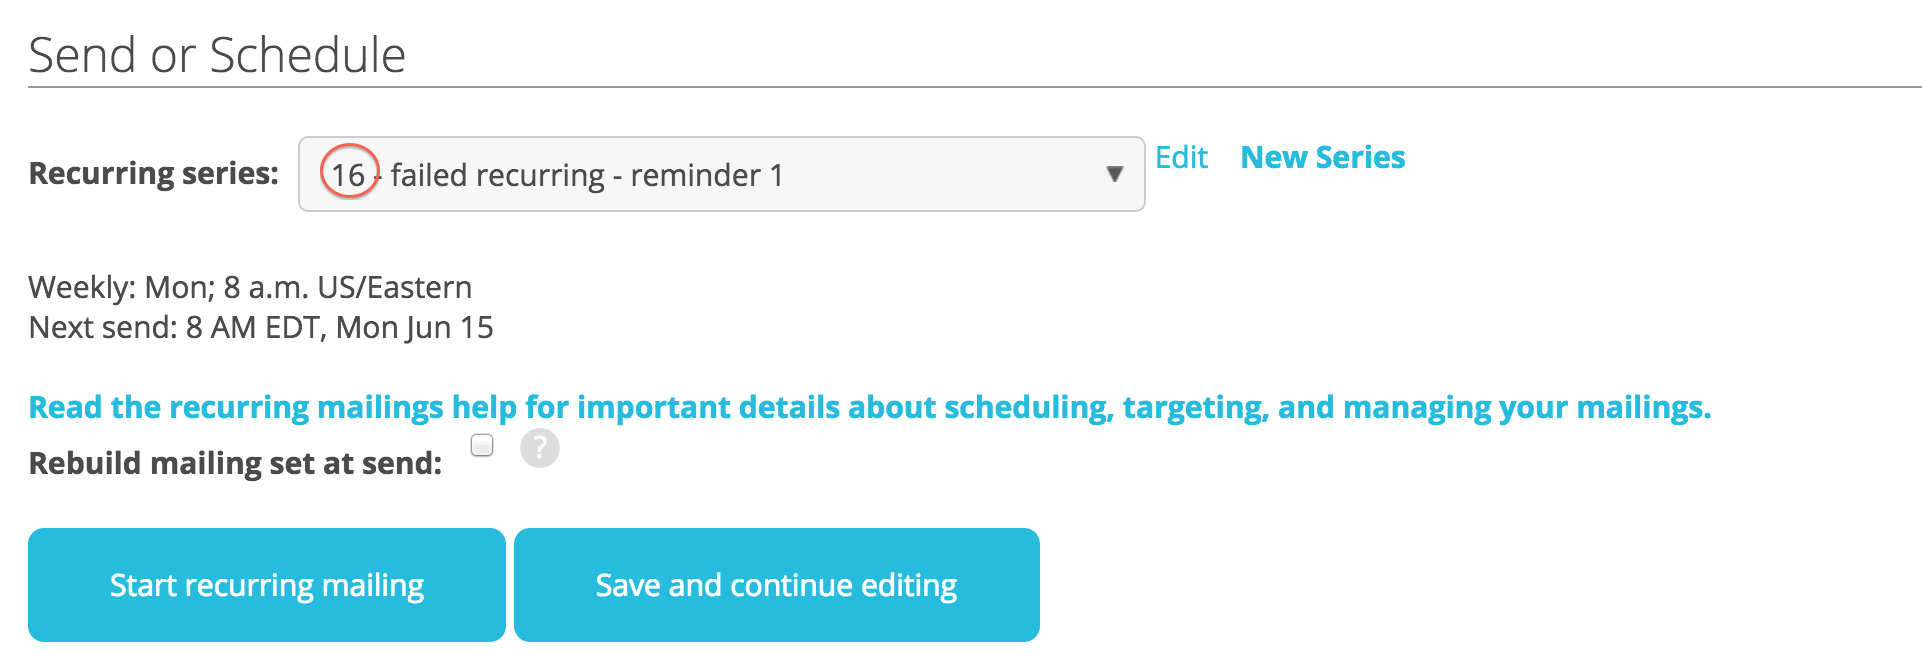
2. Click on Edit Series or See Reports.

Here, you’ll be able to click on links to reports for:

  • Overall rates for this series (or all series)
  • Rates broken out for each individual send
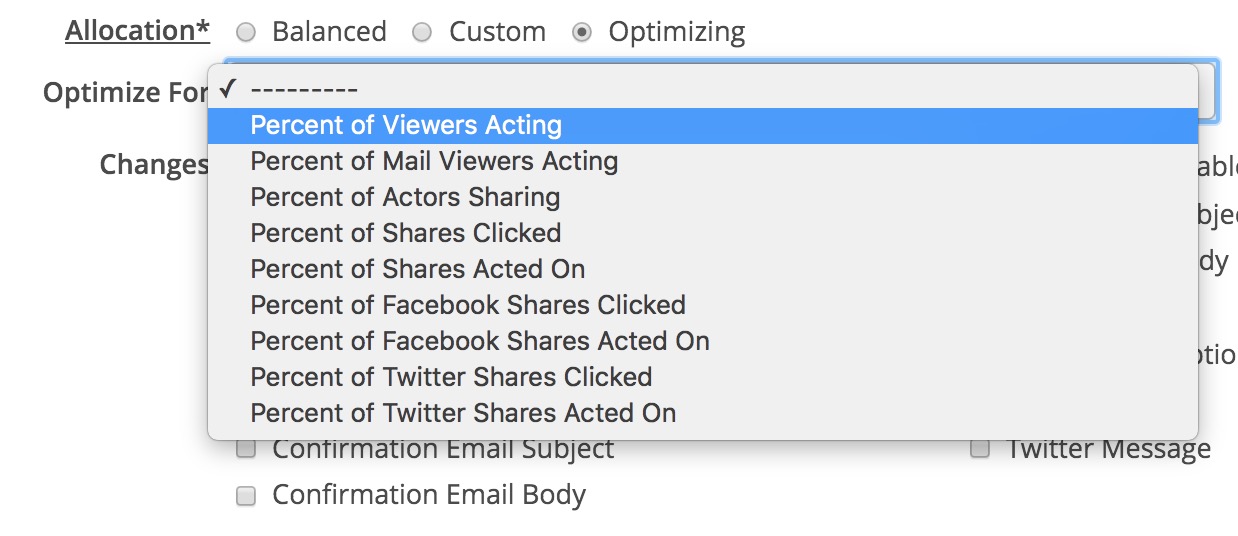
  • Subject test results
  • Clicks by link

RELATED POSTS:
How do I create a welcome series for new members?
How do I create the second mailing in my welcome email series?
How do I edit my welcome email?

Editing an Email in Your Welcome Series

You’ll periodically want to make changes to your welcome email to update the content or reference new campaigns, etc.

1. Find your mailing

Recurring mailings are shown in the scheduled section on the mailings dashboard. In the status column you’ll see the next scheduled send time.

find a scheduled mailing

2. Copy and then stop your mailing

You can’t edit a live recurring mailing. To get to a draft you can edit, you must either stop or copy your mailing.

If you copy the mailing, your current welcome email will continue to go out while you make your edits.

If you stop the existing mailing, nothing will go out until you’ve saved a new mailing in association with the schedule.

If you do decide to copy the mailing, you can make your changes, schedule the edited mailing, then submit and confirm the mailing. On the very last section — the proof and send section — you’ll then notice that ActionKit will have automatically stopped the original mailing you copied, since a recurring schedule can only be associated with one mailing.

copying a recurring mailing

RELATED POSTS:
How do I create a welcome series for new members?
How do I create the second mailing in my welcome email series?

READ NEXT:
How do I see a report showing the performance of the first recurring welcome series over time?

Adding a Second Mailing to Your Welcome Series

(Update: A previous version of this blog post included an error in targeting; we’ve corrected the mistake and updated the screenshots.)

Let’s add a second mailing to the welcome series, and have the email go out a week after the first mailing is received.

The steps are the same as before.

1. Create a new recurring schedule

Welcome Series - Second Email Schedule
Welcome Series – Second Email Schedule

2. Create the mailing

(Maybe in our second welcome, we can survey them on their specific interests with regards to our organization.)

3. Set up the targeting

Option 1: Use New to List / New to Database with Increasing Number of Days

Typically, targeting for your first welcome series email will look a little something like this:

Targeting for Welcome Series Mailing 1
Targeting for Welcome Series Mailing 1: People who joined the list 1 day ago

If you’ve joined the list 1 day ago, we want to send you an email. The exclude for people who recently received this recurring series ensures we don’t send this mailing more than once to a person.

If we wanted the second mailing in the series to arrive 3 days after the first, we would want to include people who joined the list 4 days ago:

Targeting for Welcome Series Mailing 2
Targeting for Welcome Series Mailing 2: People who joined the list 4 days ago

Note: You might be using New to Database instead of New to List, and that’s fine!

New to Database is similar but not the same as New to List

New to list means people who have been added to a list for the first time; New to database means people who are completely new to your database (regardless of which lists they might be subscribed to).

Option 2: Using “People Who Recently Received a Recurring Series” in your includes

If you want to use the “People Who Recently Received a Recurring Series” query report for your includes, be aware that the report will match anyone who has received that recurring mailing up to X days ago, not exactly X days ago.

The reason this query matches people who received this mailing up to X days ago is because it’s intended primarily for use in excludes. So if you want to use this query in your includes, you’ll have to be a little clever.

In the screenshot below, we’re including anyone who received that recurring mailing up to 7 days ago, but then excluding everyone who received that recurring mailing up to 6 days ago. In other words, we’re left with people who received that recurring mailing up to 1 day ago.

But because this method is more dependent on when the query runs / your mailing targeting builds, it’s probably better to use Option 1 above if possible.

Alternate targeting for Welcome Series Mailing 2
Alternate targeting for Welcome Series Mailing 2 using the “People Who Recently Received a Recurring Series” query in the includes

4. Start the recurring mailing

Click the button to “start recurring mailing,” then confirm the send on the next screen.

Your mailing will send every day at the specified time to any users who joined in the past day.

GO BACK:
How do I create a welcome series for new members?

READ NEXT:
How do I edit my welcome email?
How do I see a report showing the performance of the first recurring welcome series over time?

How do I find out the unsubscribe sources for recent unsubscribes?

For unsubscribes that are processed through an unsubscribe page, which is most of them, you can use the query builder to get this info.

You can create a new Actions query type, display the count of unique users, the source, and the mailing ID, and filter on whether the action was taken on an Unsubscribe page type.

query builder 1

This will return to you a table in this format:

distinct_users source mailing_id_subjects_id
24 mailing Mailing Subject Line (1212)
12 website Page Title (2341)

If you wanted to query for the specific unsubscribe page that the user unsubscribed from in the past 24 hours, you could also use the query builder to check:

query builder screenshot 2

Note that users can also be unsubscribed without going through an unsubscribe page.

For example, you can bulk unsubscribe them by uploading a CSV or TSV to an import page. In this case, a page id and a source will be mapped to these actions.

Users can also be unsubscribed via the re-engagement tool, be unsubscribed by a staff user, or be unsubscribed via the spam check system. There isn’t a page id or source associated with these methods.

If you want to see all unsubscribes for a given period broken down by type, you can find that info in the core_subscriptionhistory table. This query will show you counts by the unsubscribe type for a given date:


select csh.change_id, cst.name, count(distinct csh.user_id)

from core_subscriptionhistory csh

join core_subscriptionchangetype cst on (cst.id=csh.change_id)

where date(csh.created_at)='{{DATE}}' and change_id in (3,4,5,6,8,10,12) 

group by 1;

The types of unsubscribes are listed in the core_subscriptionchangetype table:

  • unsubscribe_bounce
  • unsubscribe
  • unsubscribe_admin
  • unsubscribe_email
  • unsubscribe_import
  • unsubscribe_spamcheck
  • unsubscribe_reengagement


How do I get a notification every time someone donates over $250?

You can create notifications that email you (or any other person or people) every time an event you specify has happened.

For example, you can:

  • send an email to the honoree about gifts made in their honor
  • alert field organizers to the details of each new event created in an event campaign
  • notify a campaign director about every 1,000 new actions on a page
  • email your development staff about each new recurring donation

First you need to add a new notification under Pages -> Other.

In the example here, we’re adding a notification that sends a notification email to Jeff, Aaron, and Tanya every time a member gives $250 or more. As you can see, the contents of the email will return the donor’s donation amount, their name, their email, and the URL of the page where they made the donation.

(You can adjust the data that gets returned via the {{ }} template tags by clicking on Snippets in the code editor.)

notify donations over 250

After you’ve created your notification, you’ll need to go to the After Action tab of your donation page and specify that you want this particular notification to fire.

notify-afteraction

Read more about notification emails here.

Creating a Welcome Series for New Members

Some groups have found that they retain more users and increase action rates by sending new members one or a series of emails welcoming them to the organization. Testing is the best way to figure out whether welcome emails are helpful for your list and what content and timing works best. The selections in this tutorial are for example purposes.

How to create a welcome email

A welcome email is like any other mailing, with a couple of extra steps.

1. Add a recurring mailing series

Before you create your mailing, you’ll need to add a new recurring mailing series.

add a recurring mailing series

The Schedule Type is daily. This means that ActionKit will look each day for any users who meet the targeting criteria for the mailing you associate with this series. The mailing is only sent on a given day if there are matching users.

Only a single mailing in a series can be active at once, so when you send out your second mailing in the welcome series, you will need to create a recurring series for the second mailing as well.

2. Create the mailing

1. Click on Mailings -> Create New Draft
2. Write your welcome email and click on Save and Target.

3. Select your targeting criteria

For our example, we want to email everyone who took their first ever action with our group the day before today.  So we select a query in the query library called new_to_database.  If you want to send this to users who joined a particular mailing list X days ago, regardless of how long they’ve been involved with your organization, there’s a new_to_list query for that.

Note: we recommend that you check that your new_to_database query is set to run **every time**. With caching, there can be slight variations in when the report runs. So if you cache this report, depending on when the report runs and when the mailing gets sent, you may end up targeting the same users as the previous day, or missing users that should have been targeted.

every time

Then on the targeting page, we’ll exclude everyone who’s received a mailing in this recurring series in the past 6 months by adding the recently_received_recurring_mailing query from the query library. *

*Note that you should add this exclude even if your targeting is limited to users who joined X days ago because a) slight variations in send time are expected for scheduled mailings and a few minutes of overlap can lead to double mailing; b) sometimes users join and rejoin in short periods, and you don’t want to send them the same welcome email in close succession. Although the latter is only relevant if you’re targeting on new_to_list, the former is an issue regardless so you should add this exclusion.

You can also set the number of days to 100000 for the recently_received_recurring_mailing query to exclude anyone who received this series ever.

welcome series targeting screen

In the example above, note that we put the value of recurring_schedule_id as 1; in general, we can check the IDs that correspond to each recurring mailing series on the page /admin/core/recurringmailingschedule/:

recurring ids

4. Save and continue to next step: Proof and send

On the Proof and Send screen, you can select the recurring series you created in the first step.

proof and send screen

You can also send yourself a proof on this screen.

Note that proofs are sent only if there are users that match the targeting. If nobody was new_to_database yesterday, you won’t receive a proof in your inbox. You can return to step 2 and temporarily change the targeting (e.g. enter your user_id in the Users box). Just remember to change it back after you view your proof!

5. Start the recurring mailing

Click the button to “start recurring mailing,” then confirm the send on the next screen.

Your mailing will send every day at the specified time to any users who joined in the past day.

READ NEXT:
How do I create the second mailing in my welcome email series?
How do I edit my welcome email?
How do I see a report showing the performance of the first recurring welcome series over time?


Recapturing Failed Recurring Donations

Let’s look at how we can use ActionKit’s recurring mailings to automate a process for recapturing monthly donors!

We’re going to walk through setting up a page where lapsed donors can sign up again, creating a mailing with a personalized ask, targeting monthly donors who failed to make a successful payment, scheduling the recurring series, and tracking results.

These instructions assume that you are targeting donors in a single currency. If you want to target recurring donors in multiple currencies read the international version.

1. Create a donation page

The first step is to create a page that allows users to sign back up for a monthly donation.

Be sure to leave “Show Other Amount” checked on the “Edit content” step – we’re going to use it to prefill the user’s previous donation amount.

Keep the link to your page handy. Ours is:

https://roboticdogs.actionkit.com/donate/keep-giving/

Now would be a good time to test your page! We’ll wait. Done? Great! Let’s go set up our the mailing.

2. Write your ask.

Click on Mailings -> Create a New Draft.

Here’s what we wrote, using the donation snippets to customize the text for this particular person.

Select the page you created in Step 1 in the Landing Page select.

The snippets above, which start “donations.” will only return values for recurring donations in the same currency as the Landing Page you select. By default these snippets include a dollar symbol, but we edited them so they’ll show the currency symbol for the landing page selected.

Regardless these snippets only work for one currency per mailing. For example, if your Donation Page is using a Payment Account in EURs, then the snippets will only use recurring donations in EURs. The default currency is USD, but it’s a good idea to specify a currency if you accept foreign currencies by selecting a Landing Page that uses the payment account for the appropriate currency.

If you want to target users giving in different currencies, see the international instructions.

We also added the following parameters to our URL to tell ActionKit to use the amount of the user’s previous recurring commitment in the mailing and as the prefilled amount on the page:

  • amount_other – set to the amount you’re asking them to give
  • prefill – used by actionkit.js to prefill the amount

You could use the parameter “amount” to prefill, but if and only if, you are sure all of the users’ amount are valid options in the form. If you are using templates derived from the current Original ActionKit templates, the javascript in actionkit.js will pre-select the amount for the user.

OK, let’s move on to targeting?

3. Target users with failed recurring donations

There are several cases we might want to catch where a user’s recurring donation is no longer being processed successfully:

  • a user canceled their own donation
  • payment processor canceled their donation
  • an admin canceled their donation
  • a user started but failed to complete signup to give a donation
  • payments failed, but the recurring order was not canceled

Here we’ll focus on users who failed to make a payment, and were subsequently canceled by the payment processor. Targeting users canceled by the processor is easy – you can use the built-in report “cards_recently_failed” to find users who have a canceled profile on which they made a successful payment in the last two months.

On the Select Recipients screen, select Add Criteria > Query Report, search for “recently” or “failed”, select the “Donors whose cards recently failed” and click Add Query.

The cards_recently_failed report searches for recurring orders marked “canceled_by_processor” with a successful payment in the last two months – but if that’s not quite the right targeting for you, you can edit this report or create a custom query.

Note: Braintree never cancels recurring orders by default. In addition, they will charge a user for all missed payments if they eventually update their card. We’ve created a custom recurring retry system specifically for Braintree so you can change this if you’d like. Contact Support to learn more.

You could also target users who failed to make a payment, but haven’t actually been canceled yet, using a slightly different query:

SELECT distinct profile.user_id
FROM core_orderrecurring profile
JOIN core_transaction failed ON (
  profile.order_id=failed.order_id AND
  failed.status = 'failed' AND
  failed.created_at > now() - interval 30 day)
LEFT JOIN core_transaction success ON (
  failed.order_id=success.order_id
  AND failed.id < success.id
  AND success.status='completed')
LEFT JOIN core_orderrecurring newer_profile ON (
  profile.user_id=newer_profile.user_id
  AND newer_profile.created_at > profile.created_at
  AND newer_profile.status = 'active' )
WHERE profile.status = 'active'
  AND success.id IS NULL
  AND newer_profile.id IS NULL

It can be tricky to test and proof recurring mailings because you may not have users who meet the targeting criteria on any given day. Proofs and the preview do not take into account your mailing schedule – they use today’s date (or, if no one would be targeted today, you’ll get an in-browser preview generated with test user data and no e-mailed proof). You can proof your mailing and review the appearance by targeting any user with a recurring profile and sending a proof, but don’t forget to change your targeting back after testing. It’s a good idea to do a final test when there are some users in the right state to confirm everything is working correctly.

4. Schedule the recurring mailing series

You’ll need to decide how often and how many times you want to email users about their failed cards.

We’re going to send this mailing once a week. We’ll create separate mailings for our second and third reminders (for those who don’t give in response to this one) so they can have different content and send on a different schedule. To make sure users who have received this mailing don’t receive it again, we’re going to add an exclusion to our targeting. To do this, we first create our recurring series by selecting the Make recurring option under Send or Schedule on the Proof and Send screen and clicking New Series.

In the pop up enter a name for the series. Each series can only be associated with one mailing. If you need to create another recurring mailing later for a different purpose that sends on the same scheduled you’ll need to make a separate series for it so it’s helpful to have the name describe the mailing purpose.

Then set the schedule. We’re setting the mailing to send Weekly, on Mondays, at 8 AM Eastern time.

Confirm that everything looks right under Send or Schedule and note the recurring series number. We’ll need that again in the next step.

To set this mailing to exclude everyone who has previously received a mailing in the series Click Save and continue editing, scroll to the top of the screen, and click select recipients.

Click Exclude Groups>Query Report, search for “recurring” and select the Recently Received Recurring Mailing report. Enter the recurring_schedule_id for your mailing and a number of days that ensure the user hasn’t received this mailing previously. Since we’re planning separate 2nd reminder and 3rd reminders set up, we really don’t want anyone to receive this particular mailing a second time unless they re-up and stop paying again. This requires two billing cycles, so we don’t want anyone to get this mailing again if they’ve received it in the last 60 days.

Now return to the proof and send screen, click Start recurring mailing, and confirm on the next screen. Our mailing is now scheduled!

Note: Alternatively, you could use this mailing for all of our reminders, if you want to send the same content on the same schedule. You’ll need to think carefully about how the interval of the targeting that looks for failed payments will interact with the frequency of your recurring mailing series. The “Donors whose cards recently failed” query looks back 2 months for a successful payment. If you sent a weekly reminder to these users, you’d email the same users every week until they either signed back up or their last successful payment was more than 2 months ago. You could end up sending one reminder or 4 or more reminders, depending on how quickly your merchant vendor marks the donation as canceled.

5. Tracking Results

The mailing report for recurring mailings includes data for all of the mailings in the series. Under /dash/mailings, click Scheduled, and find your mailing. The subject is linked to the Mailing Report page.

https://roboticdogs.actionkit.com/docs/manual/guide/mailingsnew.html#recurring-mailing-reports

We definitely recommend you track trends here!

Adding a Global Exclude for Mailings

When you’re creating new mailings, sometimes you’ll want to consistently exclude the same targets — like new users receiving mail from a welcome series, or users on the re-engagement list.

ActionKit offers a way to set up global excludes, which’ll save you time.

Here’s how to set it up:

1. Click on configure actionkit under your users icon.

configure_actionkit

Underneath Mailer Targeting Defaults, you’ll see Mailer Default Exclude Queries.

2. Click on the “Edit” button next to the second heading.

mailing_targeting_excludes1

This will bring you to a page that allows you to select a query report. Note that the only reports that will show up here are those tagged mailer.

mailing_targeting_excludes2

3. In this example, we’ll select our “people who recently received a recurring series” report because we want to exclude new members who received a welcome mailing in the last day.

mailing_targeting_excludes3

We fill in “4” for recurring_schedule_id, as you can see above, because if we check admin/core/recurringmailingschedule/ under Mailings -> Manage Recurring, we note that that’s the id number of our welcome e-mail series. And we input “1” because we want to exclude those who’ve received that recurring mailing only within the past day.

4. Now, when we go to create a new mailing, and land on the targeting page, we’ll see that this query is automatically included in the excludes section of our targeting!

excludes


A/B Testing Your Way to Increased Action Rates

A/B tests are live experiments that you can conduct on your pages to determine the optimal layout or content that results in the most conversions. Through ActionKit, you can create different variations for your pages, test them against each other, and track each variation’s action rates.

Let’s say you’re outraged by the fact that Chewbacca was not given a medal at the end of Star Wars: Episode IV. You’ve created a new donation page to raise money for Chewbacca’s medal of bravery.

chewbacca-nomedal

Now you want to run a couple of A/B tests to increase the number of people donating on the page. What do you do?

Create a test

To access ActionKit’s A/B testing tool for pages, click on the “change test options” link at the top of the page.

Screen Shot 2015-12-15 at 11.05.17 PM

Click to add a test.

2.2

Let’s test the addition of an image to the content area in the “page intro” section. Click the Page intro checkbox and add an image to variation #2.  

chewbacca_abtest_1

Specify the percentage of visitors that see each variation

Allocation refers to the division of visitor traffic among your variations. ActionKit offers three allocation options: balanced, custom, and optimizing.

In the example above, we’ve chosen a Balanced allocation. This means that users landing on the page will be divided evenly between the variations. One half will see the image; the other half will not.

Alternatively, you could have set up more than two variations — say, if you wanted to not only compare the presence of an image with the original, but also wanted to test two slightly different images.

You can also disable existing variations.

add_disable_variation

We’ll talk about the other allocation types in a future post.

Start your test

Once you’ve got your variations set up, you can preview your pages.

chewbacca_abtest_4

Click the View link underneath each variation. You’ll see ?variation=3, etc. at the end of the URLs when you preview, but the real user won’t see these URL fragments.

When you’re satisfied with how your pages look, click Start to begin sending user traffic to them.

Once you start running a test, you can stop it at any time, and the data collected during each trial will be saved. The start/stop times of each trial will be listed under Trial Periods.

chewbacca_abtest_9

Pick a winner

ActionKit provides a handy Stats section to help you pick a winner. You toggle different statistics by clicking the checkmark for the type of data you want.

stats2

On this page, our goal is to raise the most money for Chewbacca, so let’s take a look at All Orders.

stats3

Before you can be confident that your results are meaningful, you’ll need to make sure your results are statistically significant. There are a number of statistical significance calculators online that you can use to calculate whether or not a winning variation is statistically significant.

When you’re confident of a winner, click on Stop & Apply below the winning variation to direct all future user traffic to this variation.

A/B testing across multiple pages at once

ActionKit also lets you test on multiple pages at once.

Simply add more pages to the Pages field, and the test will be active on all of them.

This only makes sense if you’re testing content that could be applicable across several different pages at once — for example, if you were testing layout changes by comparing one templateset vs. another. (Chewbacca’s intro text variations do not fall into this category.)

afteraction2

Next up: Learn how to optimize your share pages with ActionKit’s A/B testing tools.


Read the full documentation on A/B testing pages here:

http://docs.actionkit.com/docs/manual/guide/page_tools.html#tests

Optimize your share pages with ActionKit’s A/B testing tools

In our last tutorial, we showed you how ActionKit’s a/b testing tools can be used to optimize your action rates. You can use the same tools to test your share page content and layout. The share page is the page the visitor is redirected to after they submit an action, and typically will include a call to action for the user to share the page with their networks.

Let’s look at an example:

In our continuing campaign for justice for Chewbacca, we’re petitioning the Rebel Alliance to get him his medal. To maximize public outcry we want to:

  • Test our share page template layout. Would more people share if the page had a spaceship theme with extra-large buttons? Or would they share more if the page looked like the default?
  • Test our sharing language for Facebook and Twitter to see which images and share text pull in more new signers.

It’s easy to test more than one thing on a page in ActionKit.

Setting up the first experiment: testing design

Start by adding the first test:

sharetest1

The layout with the spaceship theme and extra-large buttons is reflected in one of the templatesets, so that’s what you’ll select for testing:

sharetest3

Last time we used the default allocation of balanced.  Now let’s look at what the other allocations do.

A custom allocation lets you edit the numeric weights on each variation and divide up users according to their relative weights.

There are a couple of reasons why you might decide to use a custom allocation. First, there might be a high-risk, radical change to the page that you’re unsure of, but which you’d still like to test. You can minimize the risk by allocating only 20% of your visitors to this new variation.

Alternatively, perhaps there’s a new variation — a call-to-action popup, perhaps — which won a recent A/B test. However, you’d like to validate it over the long term, since user behavior does change, and you want to make sure it doesn’t eventually have a negative effect. You can allocate 95% of visitors to the popup, and leave 5% for the old variation that did not have a popup.

Note: If you’ve set a custom allocation at the beginning of an experiment, make sure you don’t change the allocation percentages in the middle of an experiment! Doing so will invalidate your results.

Finally, the optimizing allocation option lets you optimize for a particular conversion goal such as percent of shares acted on or percent of viewers acting. ActionKit will automatically adjust the numeric weights and send users to the best-performing variation based on the goal you’ve set.

Screen Shot 2015-12-18 at 5.49.20 PM

In this example, let’s choose optimizing for our allocation, and select percentage of shares acted on as the statistic we want to optimize on.

Now that you’ve made your selections, click Save. You’ll be taken to the Test Dashboard.  

Click on View in order to preview each variation.  Submit your signature to  view the after-action page, where you’ll land on the variation you’ve chosen to preview.

template-share-default

template-share-spaceship

Setting up the second experiment: testing share content

Our second experiment tests different sharing titles, sharing descriptions, images, and twitter messages on the after-action page.

Below we’ve added only two variations, but you can add as many variations as you’d like.

afteraction3

Once you save this experiment, you can preview its variations.

sharecontent2sharecontent1

fb-share2fb-share1

Running multiple tests at the same time

The tests that are currently active will show up in the meta summary below your page title. You can have multiple tests running at the same time.

afteraction6

If you click to stop any of the tests, the links to their individual dashboards will disappear from the meta summary.

stoptests

Stats

If you’re running two different tests at the same time, the stats dashboard will reflect each of the cross-variations.

multi_stats

The dashboard gives you some stats you might find particularly helpful:

  • the number of new users generated from a particular variation.
  • the actions from shares
  • the percent of shares acted on (the # of actions divided by the # of shares)
  • the new users from shares

Since we’ve chosen an optimizing allocation, ActionKit will automatically siphon a larger and larger percentage of visitors to the winning variation.

Once it’s reached statistical significance, you can stop the test and apply it.