A/B tests are live experiments that you can conduct on your pages to determine the optimal layout or content that results in the most conversions. Through ActionKit, you can create different variations for your pages, test them against each other, and track each variation’s action rates.
Let’s say you’re outraged by the fact that Chewbacca was not given a medal at the end of Star Wars: Episode IV. You’ve created a new donation page to raise money for Chewbacca’s medal of bravery.

Now you want to run a couple of A/B tests to increase the number of people donating on the page. What do you do?
Create a test
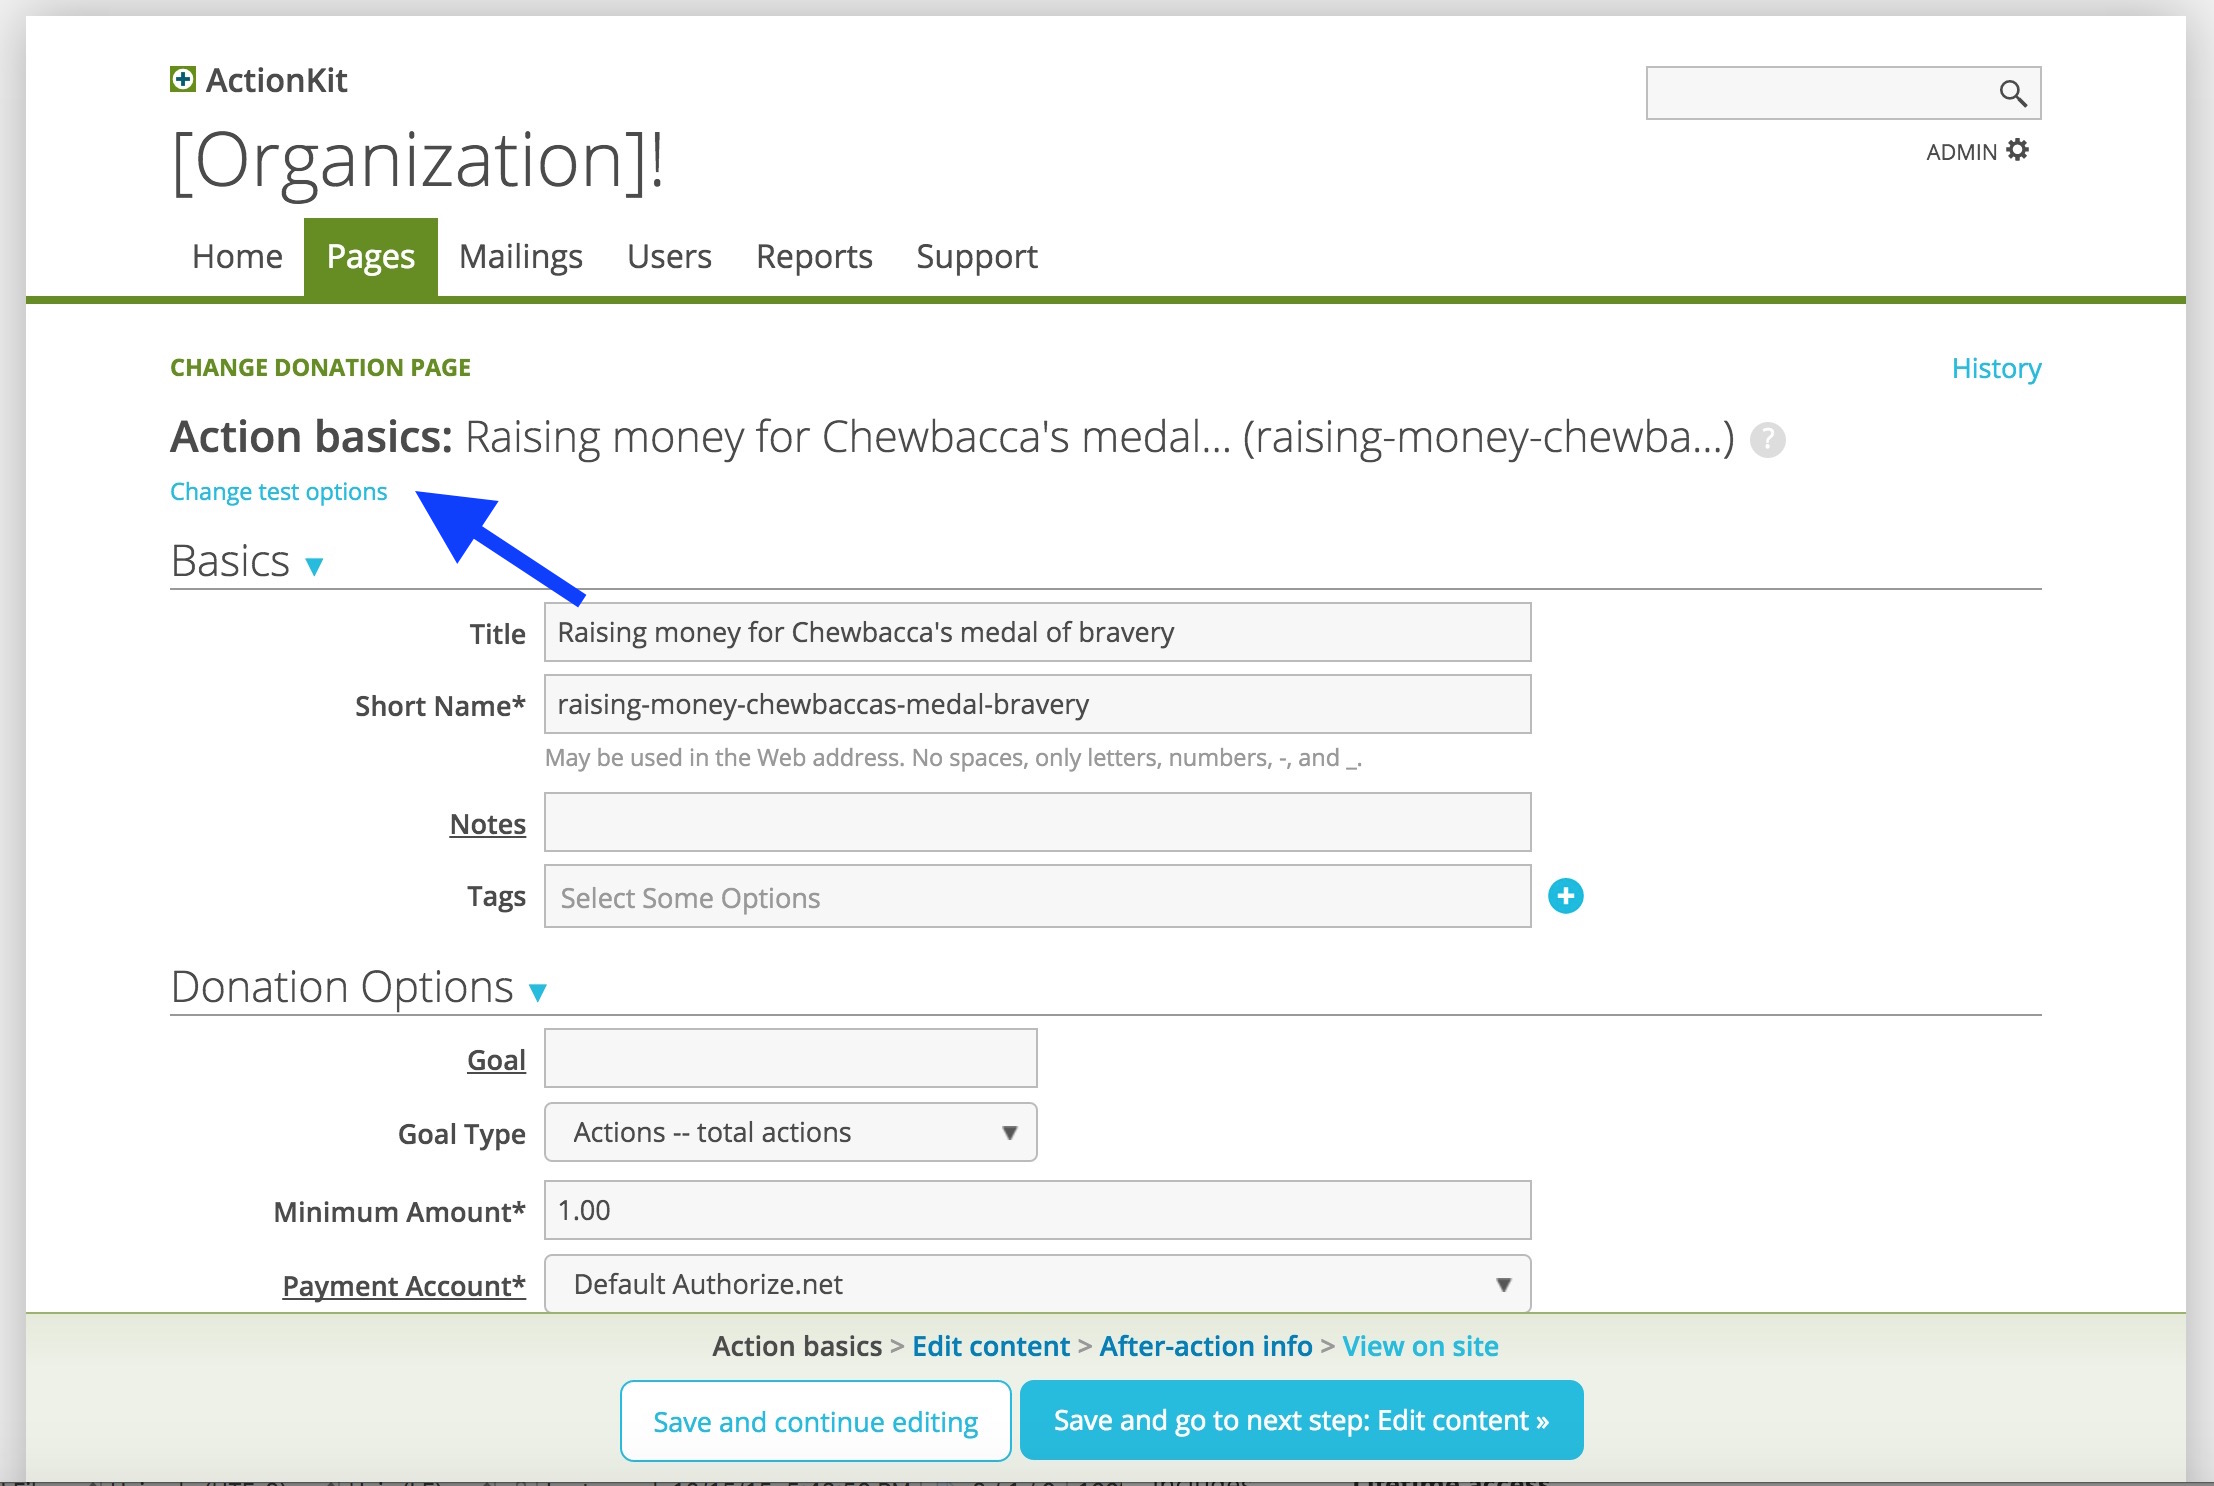
To access ActionKit’s A/B testing tool for pages, click on the “change test options” link at the top of the page.
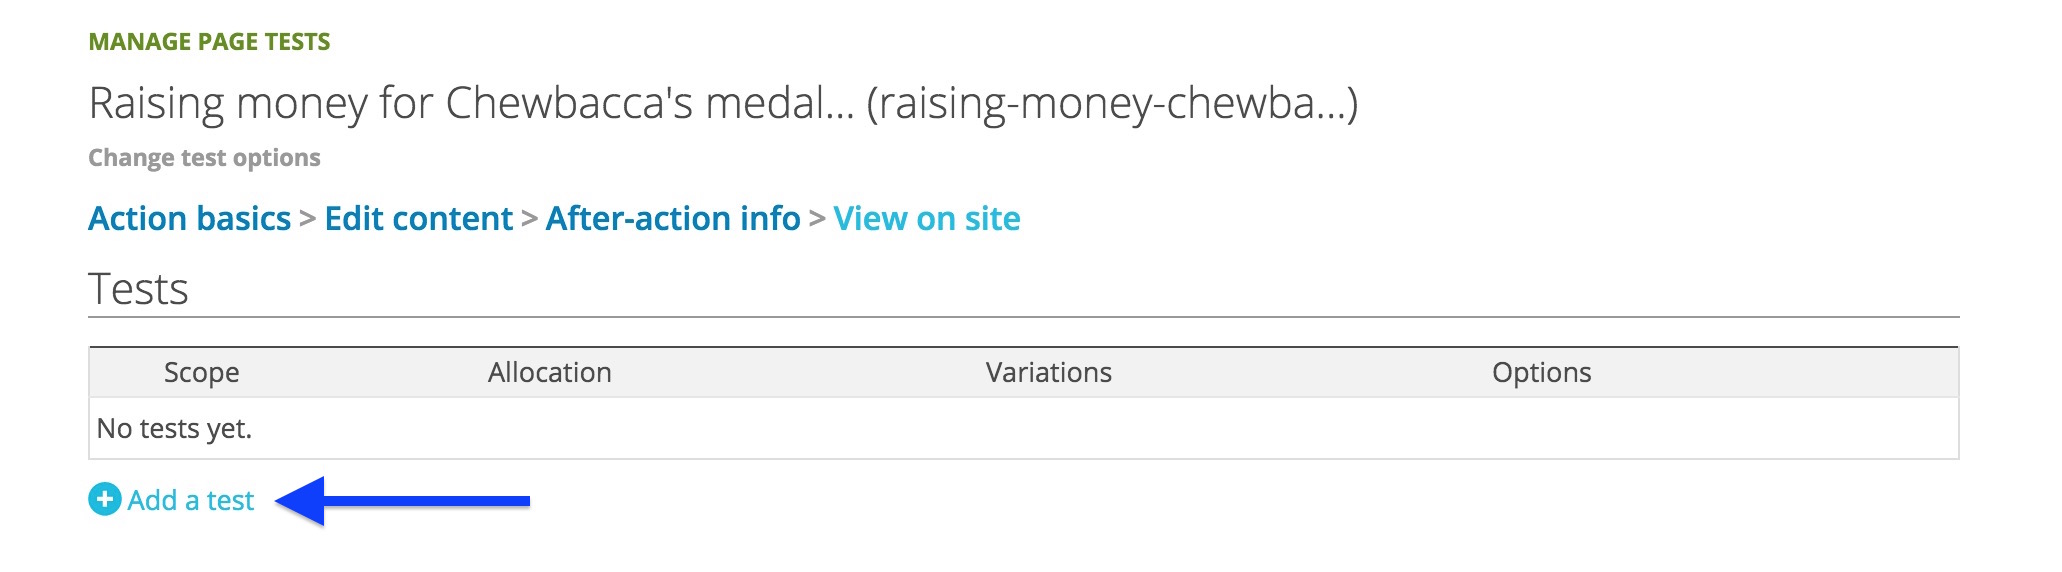
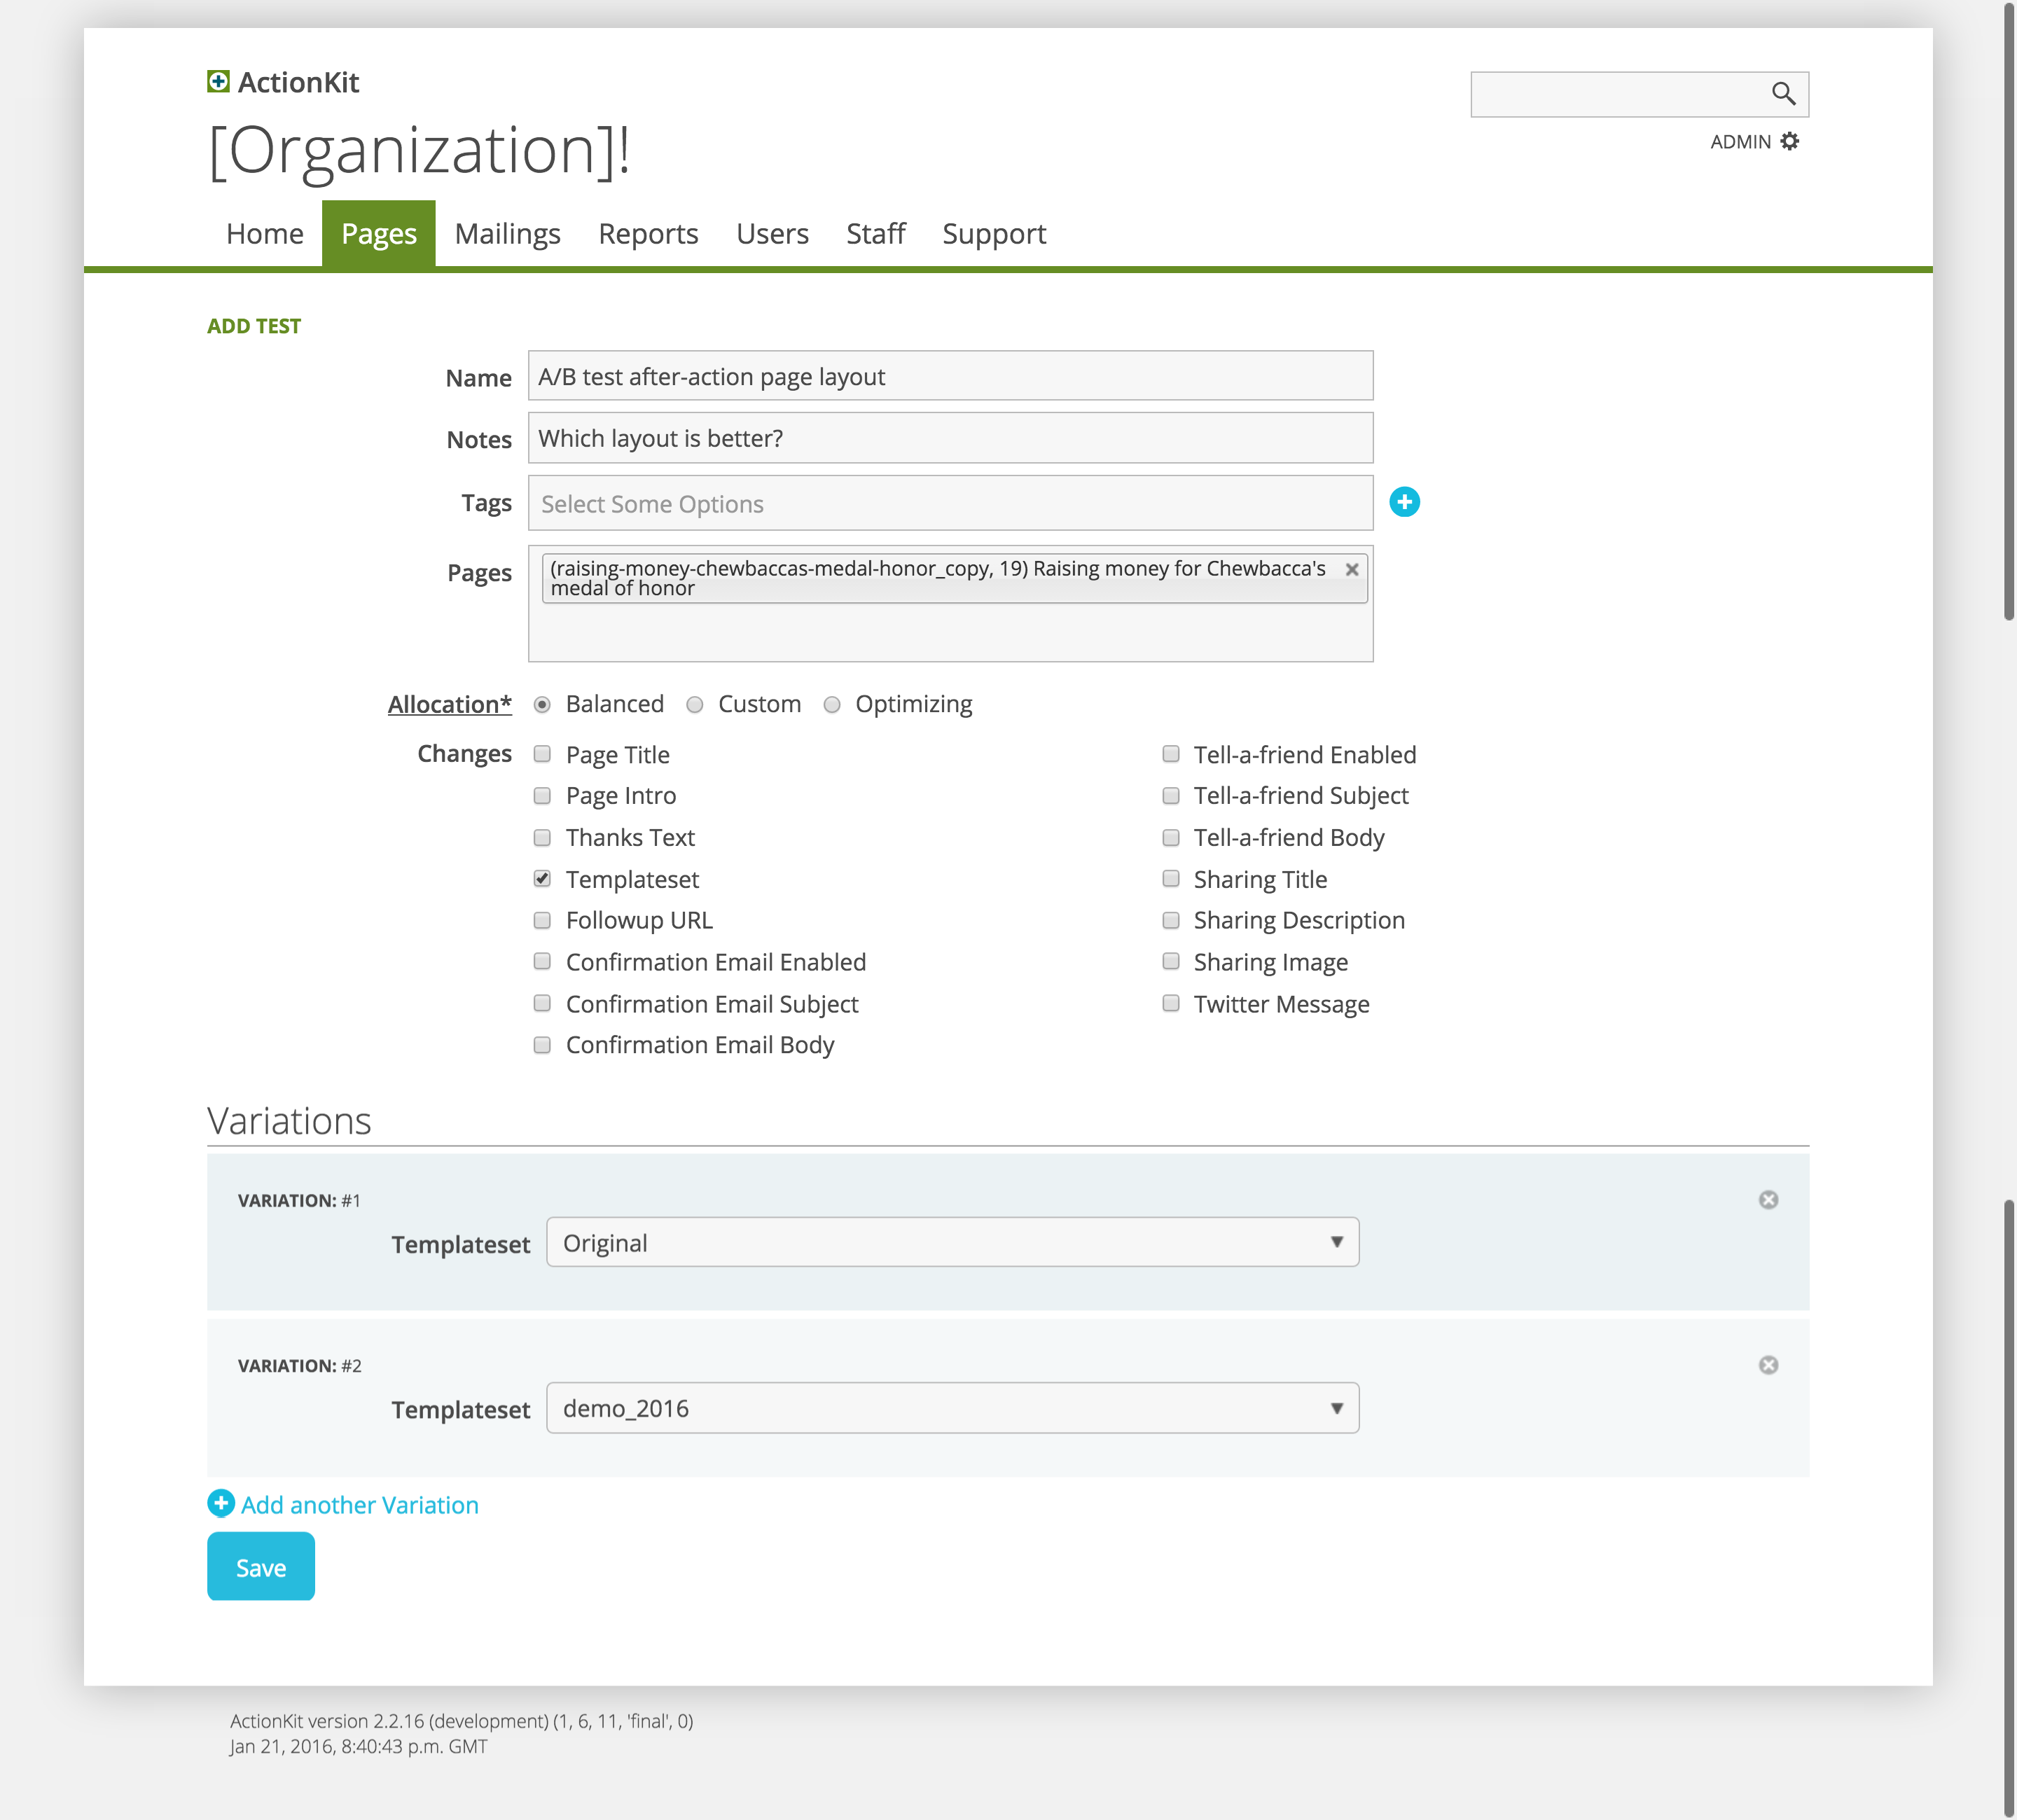
Click to add a test.
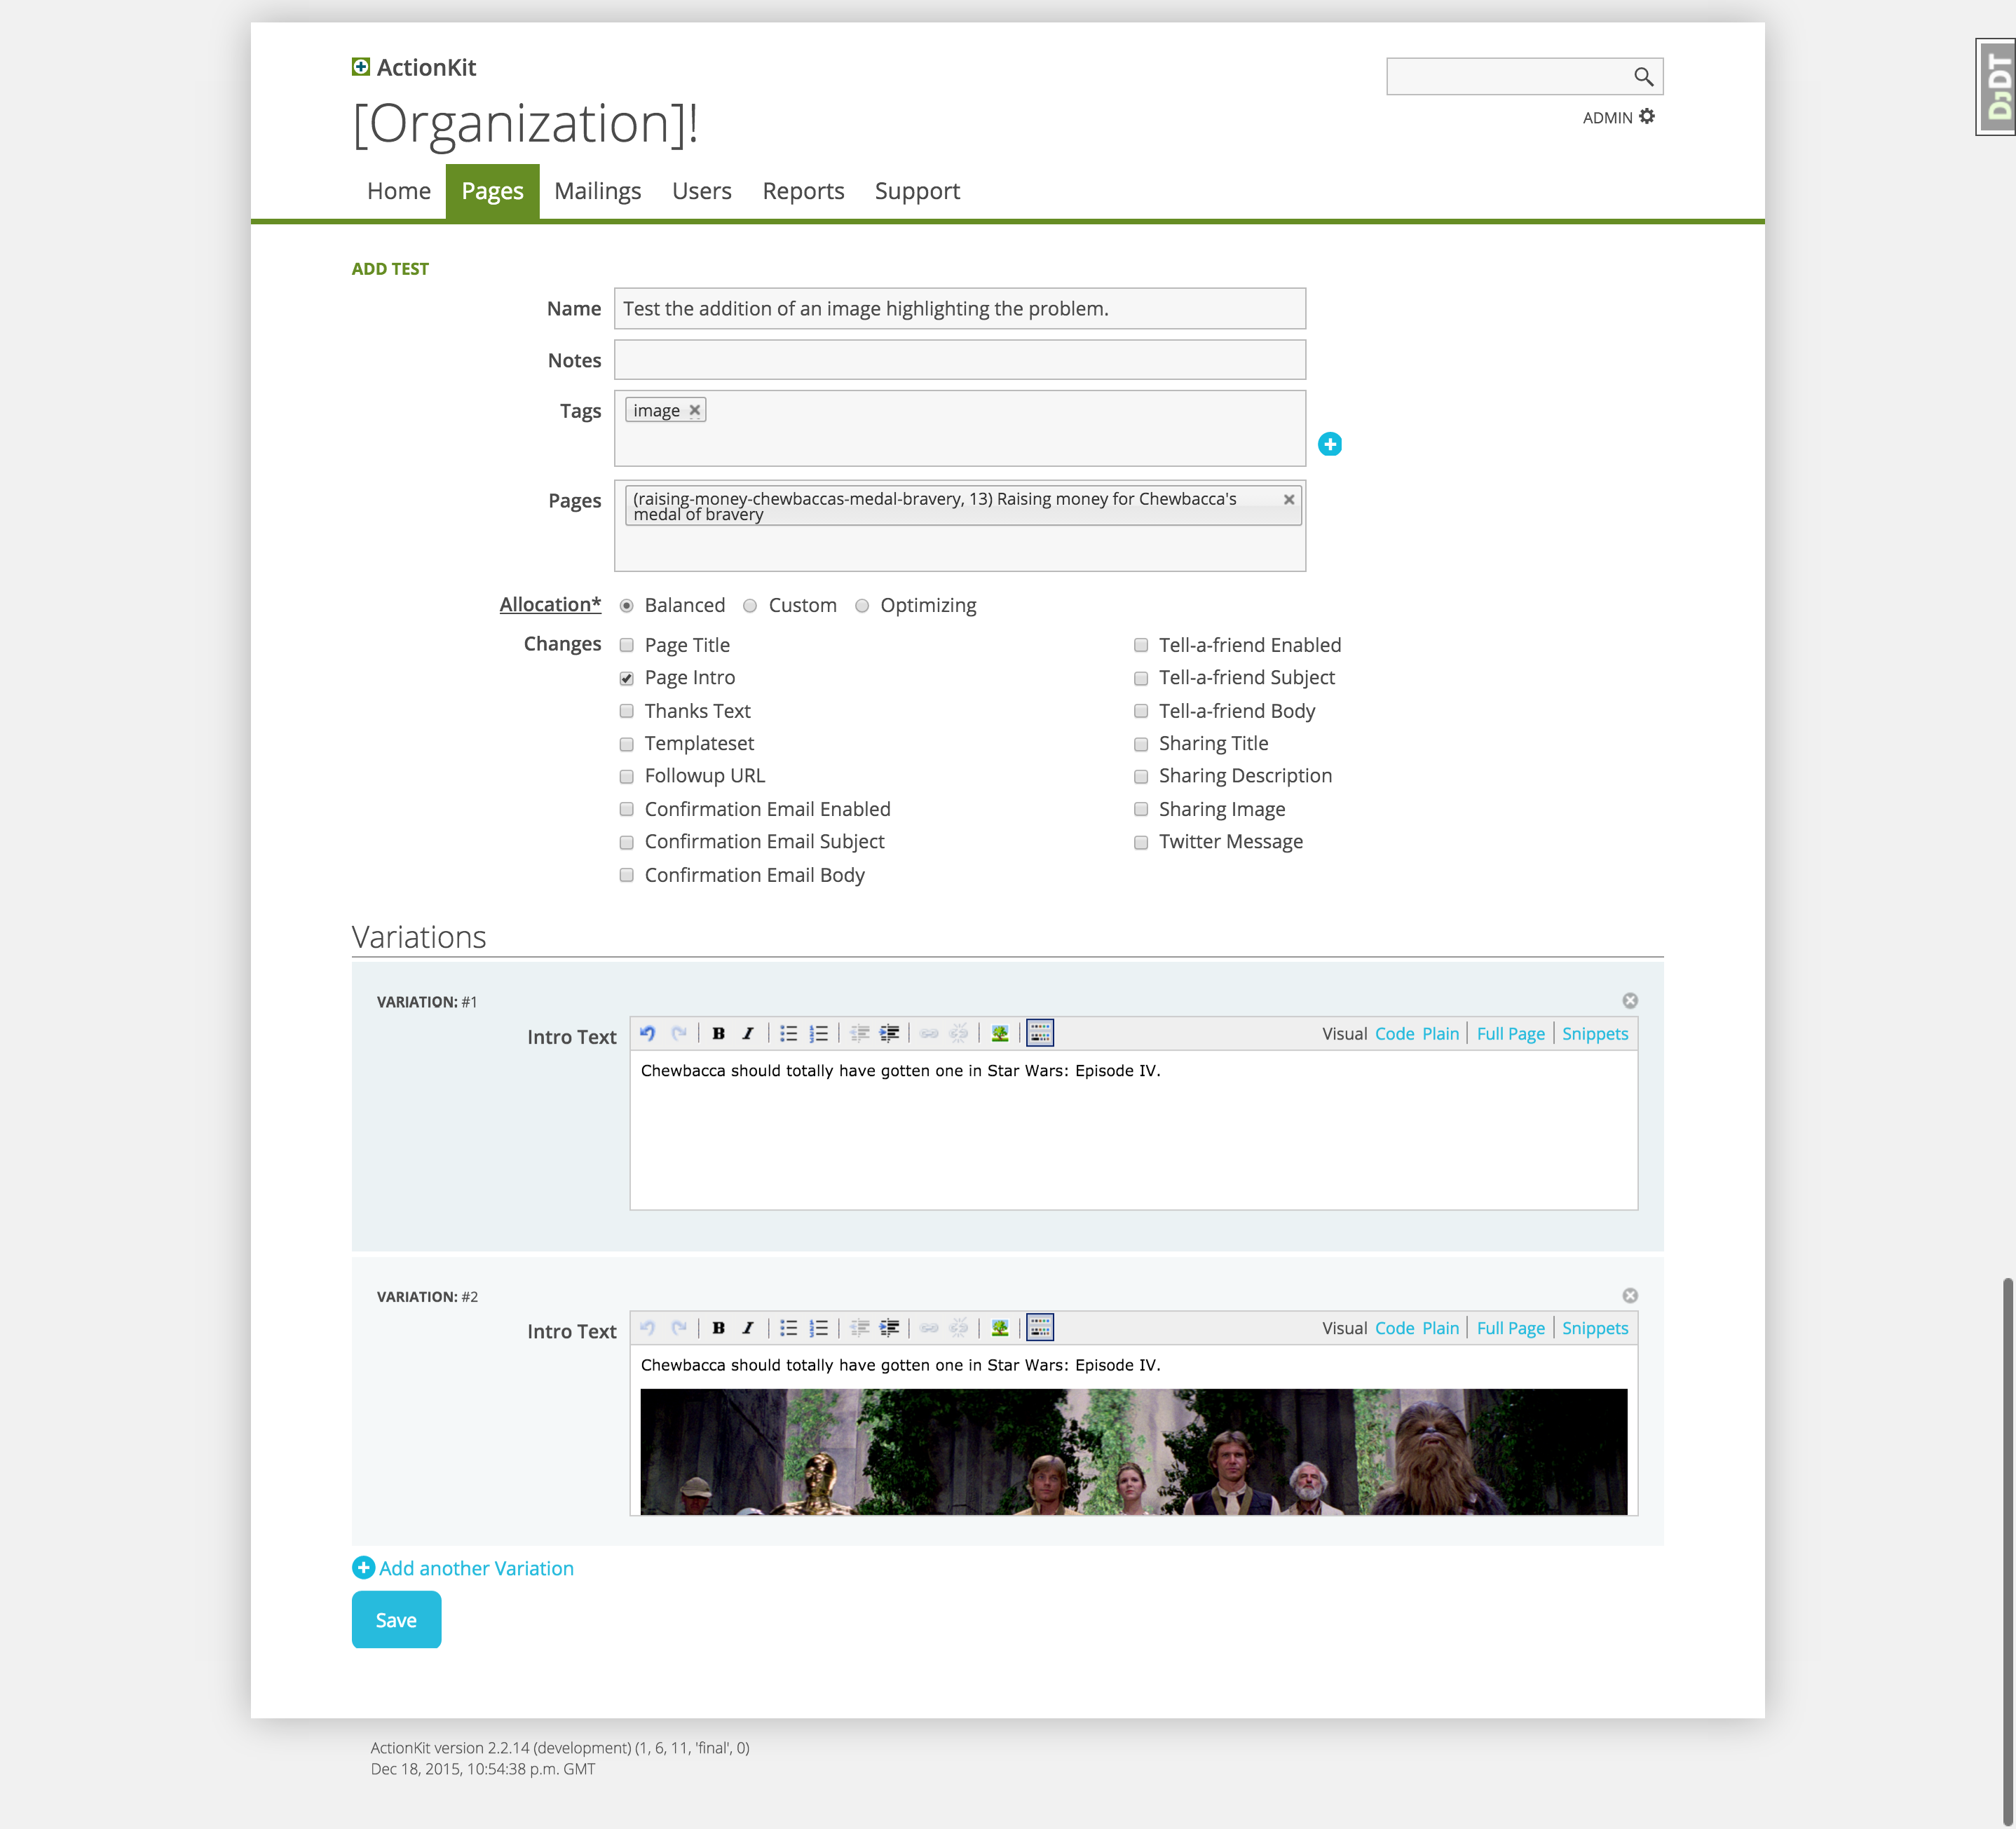
Let’s test the addition of an image to the content area in the “page intro” section. Click the Page intro checkbox and add an image to variation #2.
Specify the percentage of visitors that see each variation
Allocation refers to the division of visitor traffic among your variations. ActionKit offers three allocation options: balanced, custom, and optimizing.
In the example above, we’ve chosen a Balanced allocation. This means that users landing on the page will be divided evenly between the variations. One half will see the image; the other half will not.
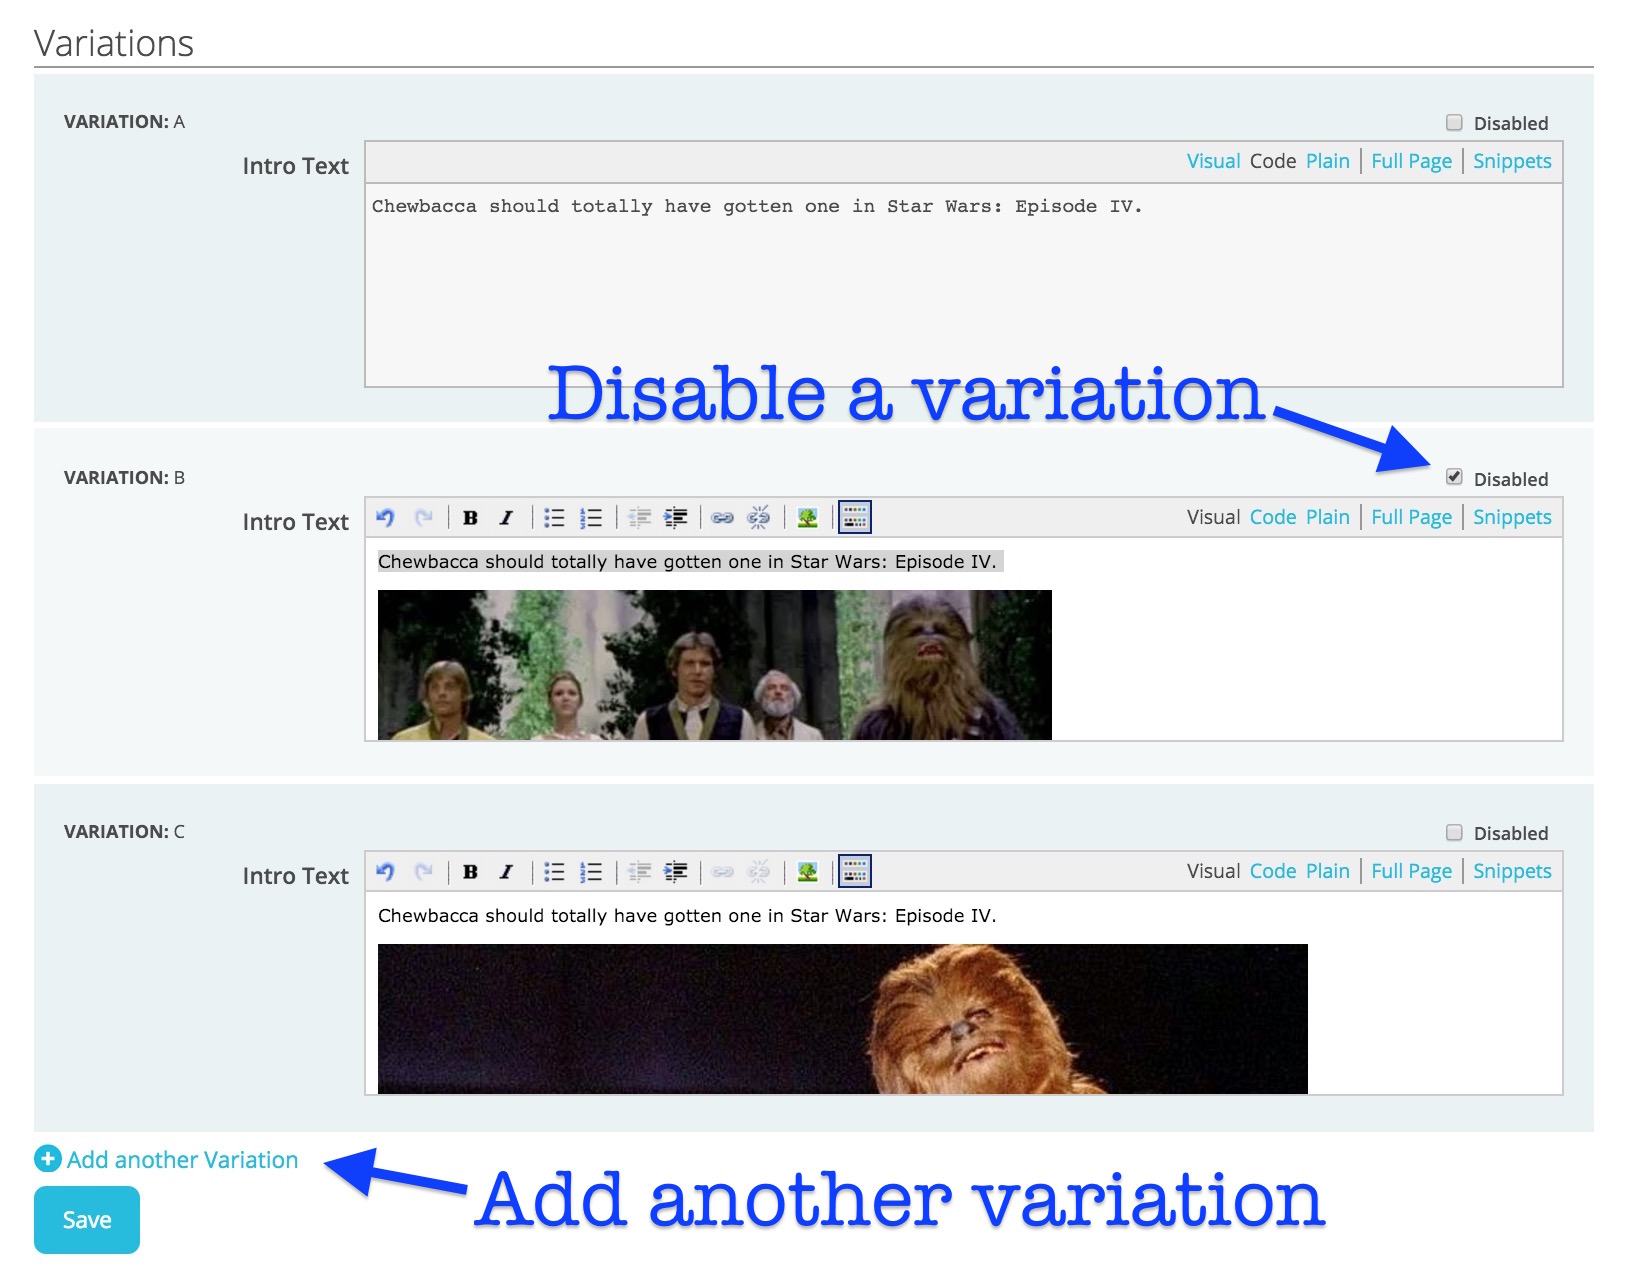
Alternatively, you could have set up more than two variations — say, if you wanted to not only compare the presence of an image with the original, but also wanted to test two slightly different images.
You can also disable existing variations.
We’ll talk about the other allocation types in a future post.
Start your test
Once you’ve got your variations set up, you can preview your pages.
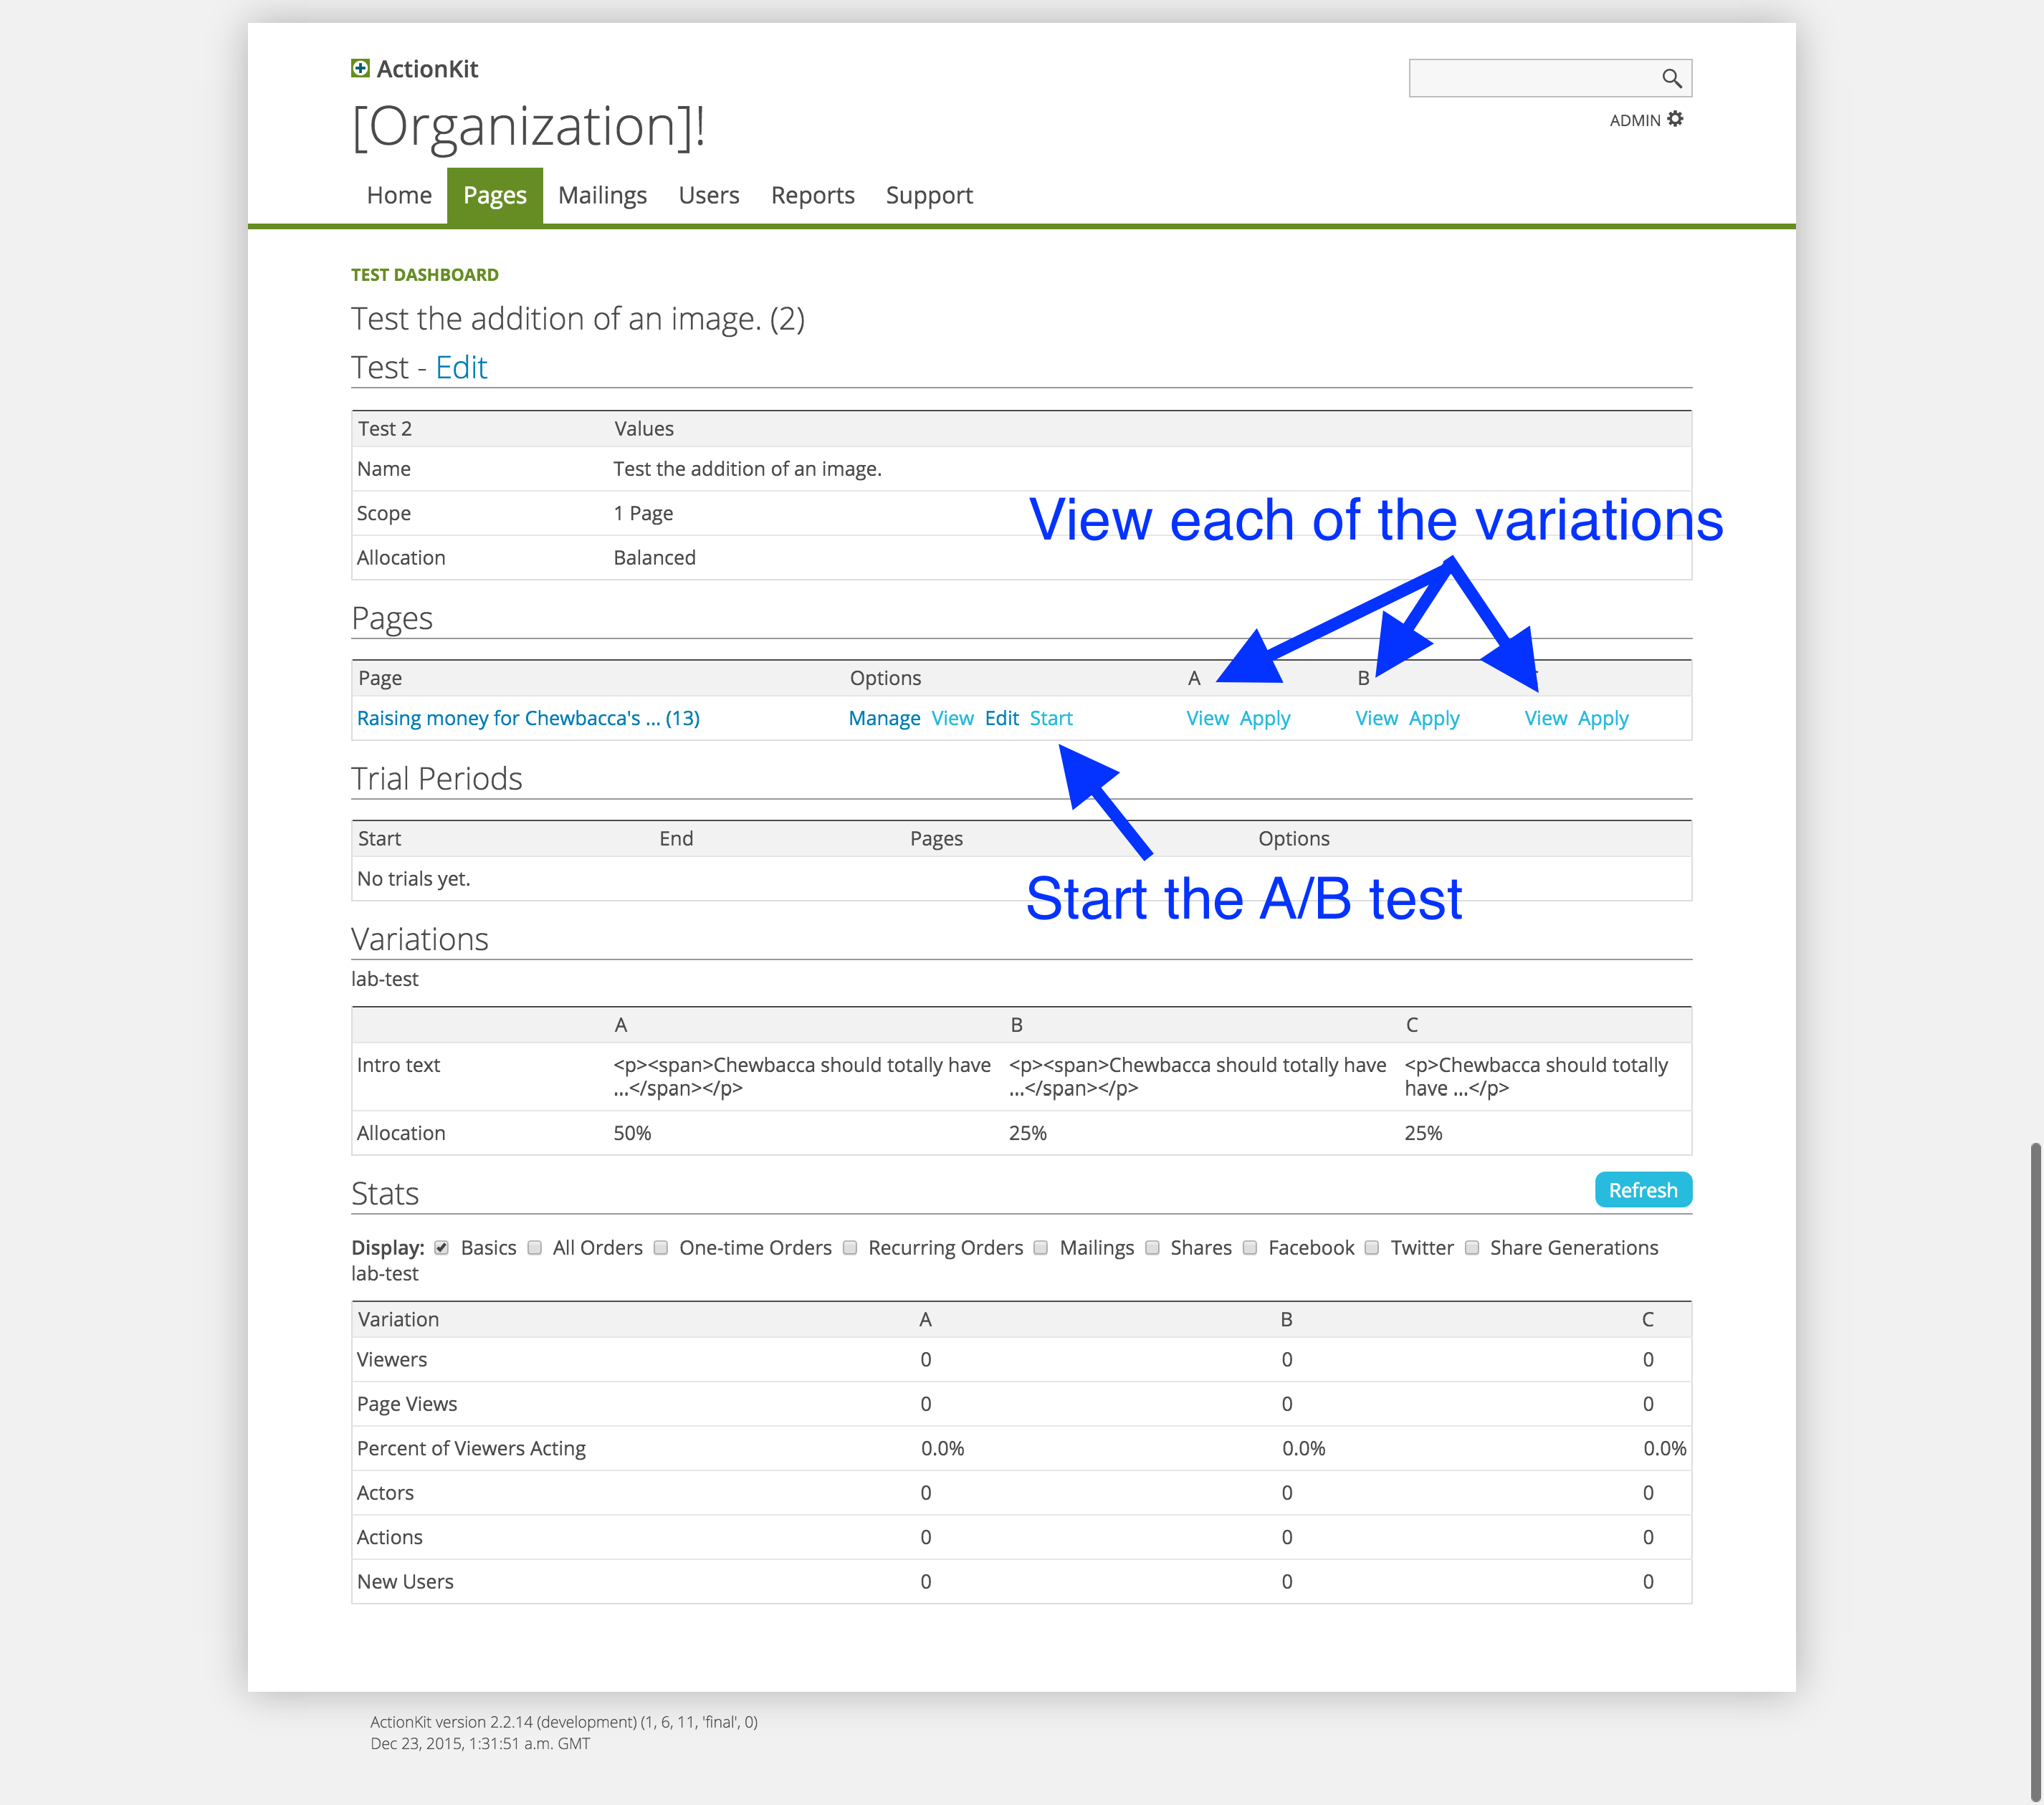
Click the View link underneath each variation. You’ll see ?variation=3, etc. at the end of the URLs when you preview, but the real user won’t see these URL fragments.
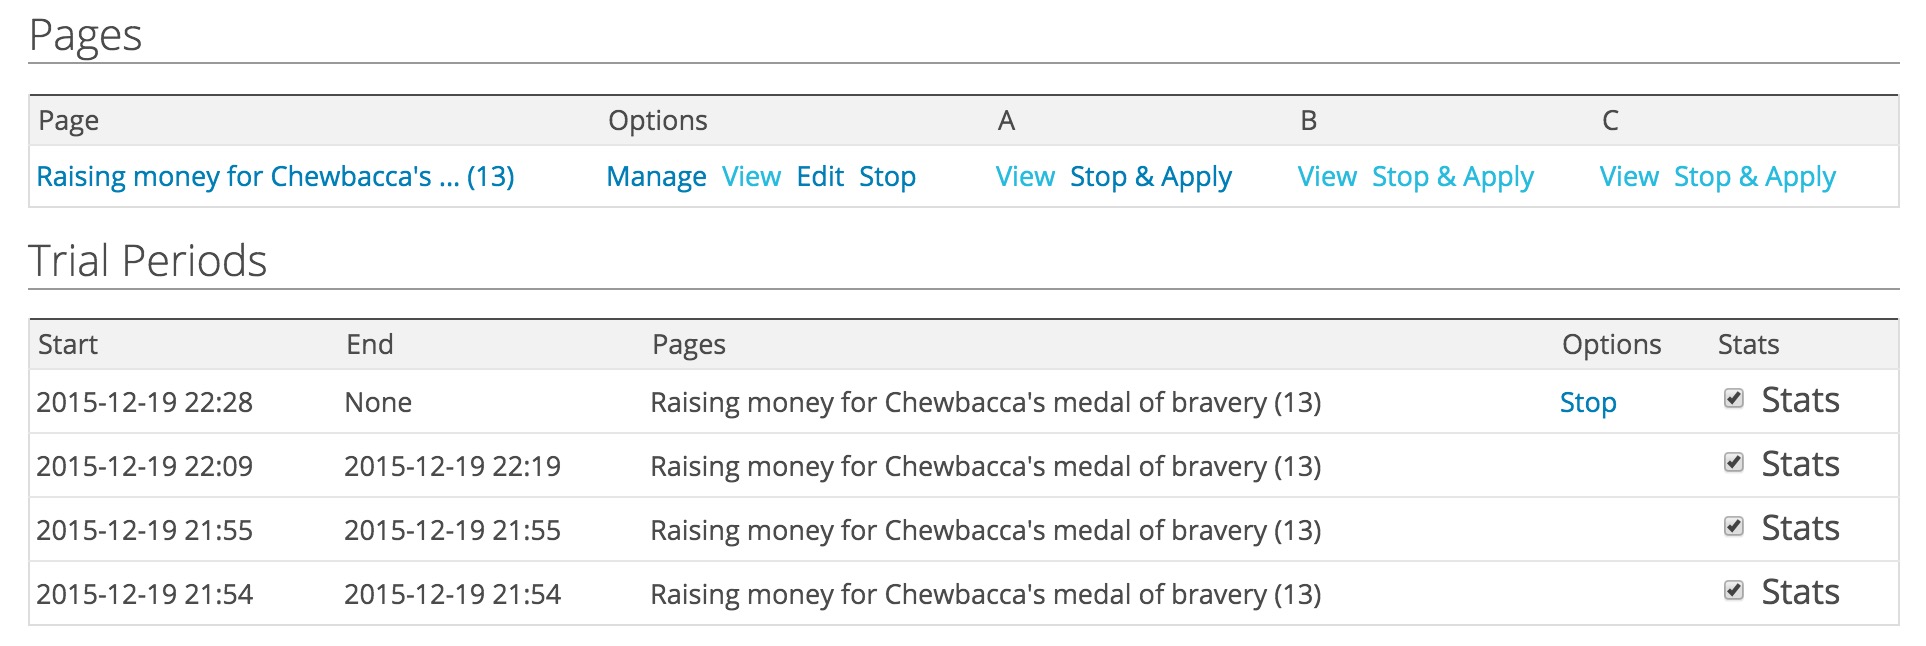
When you’re satisfied with how your pages look, click Start to begin sending user traffic to them.
Once you start running a test, you can stop it at any time, and the data collected during each trial will be saved. The start/stop times of each trial will be listed under Trial Periods.
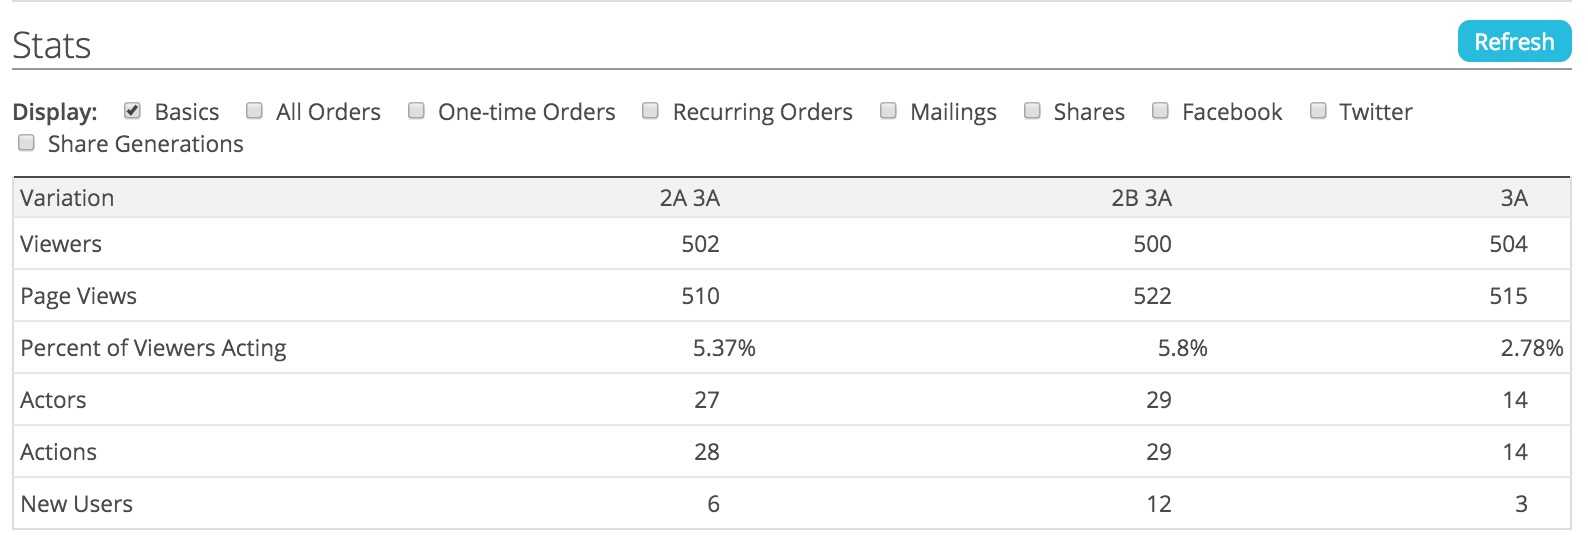
Pick a winner
ActionKit provides a handy Stats section to help you pick a winner. You toggle different statistics by clicking the checkmark for the type of data you want.
On this page, our goal is to raise the most money for Chewbacca, so let’s take a look at All Orders.
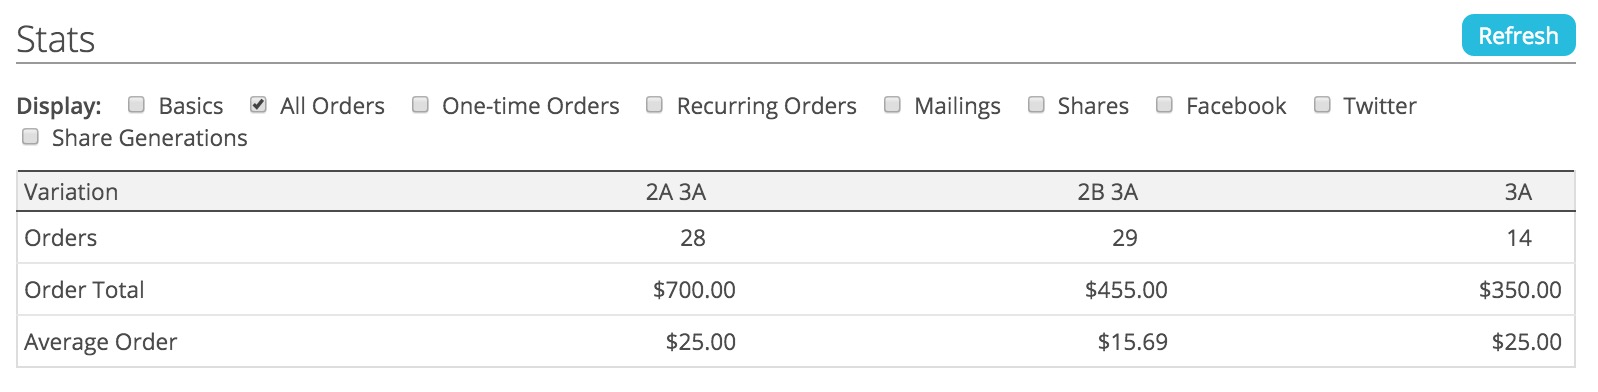
Before you can be confident that your results are meaningful, you’ll need to make sure your results are statistically significant. There are a number of statistical significance calculators online that you can use to calculate whether or not a winning variation is statistically significant.
When you’re confident of a winner, click on Stop & Apply below the winning variation to direct all future user traffic to this variation.
A/B testing across multiple pages at once
ActionKit also lets you test on multiple pages at once.
Simply add more pages to the Pages field, and the test will be active on all of them.
This only makes sense if you’re testing content that could be applicable across several different pages at once — for example, if you were testing layout changes by comparing one templateset vs. another. (Chewbacca’s intro text variations do not fall into this category.)
Next up: Learn how to optimize your share pages with ActionKit’s A/B testing tools.
Read the full documentation on A/B testing pages here:
http://docs.actionkit.com/docs/manual/guide/page_tools.html#tests
Interested in scheduling a demo with ActionKit? Let us know!
1 thought on “A/B Testing Your Way to Increased Action Rates”
Comments are closed.