Many ActionKit clients have their own custom welcome series for new subscribers. Below is a step-by-step guide – the options detailed below are just one potential setup – how you configure your welcome series is up to you! Please be thoughtful about what might work for your organization. If you prefer to watch a step-by-step video on this subject, you can also watch the embedded video below:
How to create a welcome email
Creating a welcome email is similar to any other mailing, with a few extra steps. To create a welcome series, we’ll first need to set up a recurring mailing.
1. Add a recurring mailing series
Recurring Mailings in ActionKit replace ‘triggers’ in other systems. Every recurring mailing has its own designated series.
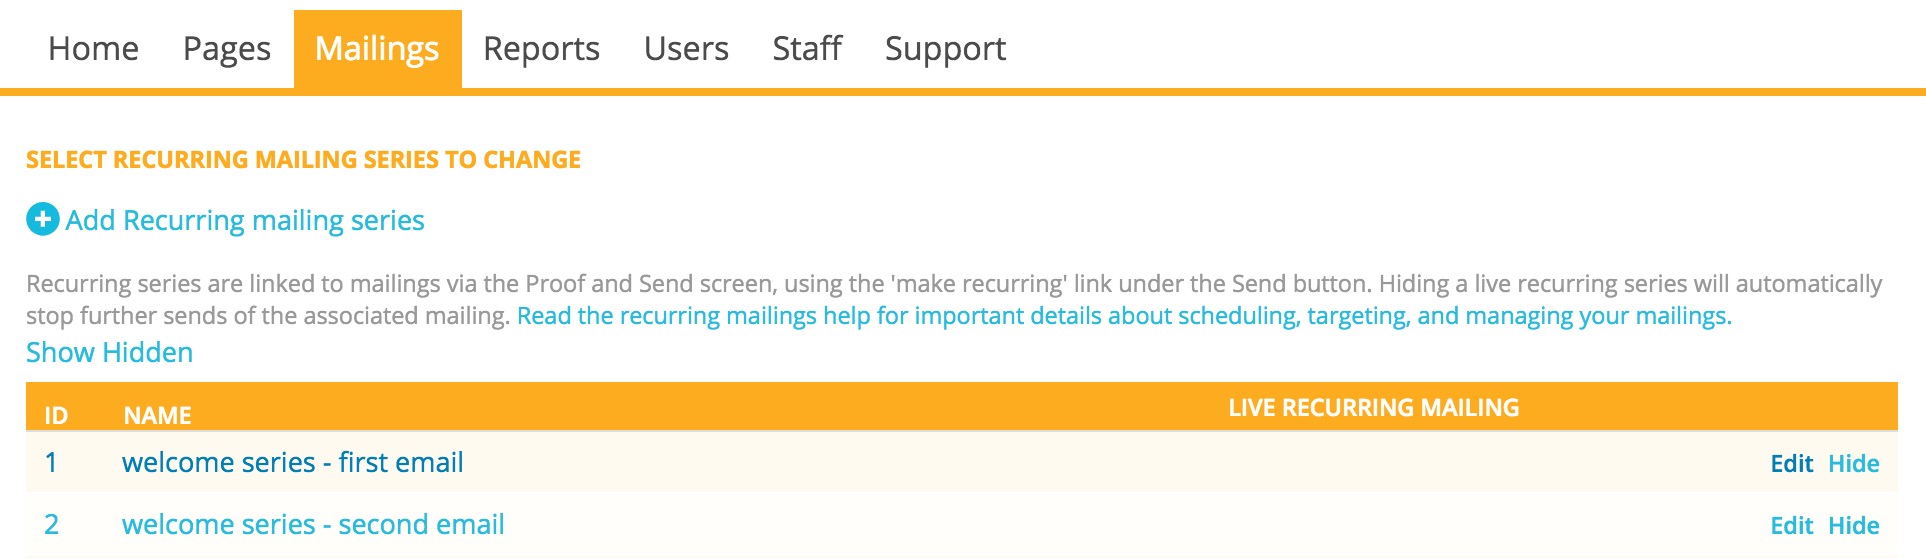
From the “mailings” tab, click the “recurring mailings” button on the right-hand nav, and then click the “add a recurring mailing series” link. You should see the screen below:

Name your series something descriptive and set the Schedule Type to “daily”. This setting tells the ActionKit Platform to check each day for any users who meet the targeting criteria for the mailing you associate with this series. The mailing is only sent on a given day if there are matching users.
Next, choose your timezone and select the time you want your email to send. If you check the “Notify Me When Mailings Finish” box, you’ll receive an email every time a mailing in this recurring series finishes sending (if you are sending daily, it could be a lot of emails). Click the blue “save” button to proceed. Each recurring series can have only a single mailing active at once, so if you want to have multiple mailings in your welcome series, you’ll need to create a recurring series for each one.
2. Create the mailing
For the purposes of this tutorial, we’ll assume you already know how to create your own mailing content, but if you need help, please review our documentation on “creating a mailing”.
3. Select your targeting criteria
For this example, we’ve decided we want to email people on the first day after their initial subscription – completely new people, not people who have resubscribed for a second time. ActionKit comes with a default query in the query library called “New -to-database users” that meets our desired targeting choice. If you decide want to send this to users who recently subscribed regardless of whether or not they are entirely new, there’s a “new-to-list users” query for that.
Note: we recommend that you check that your “New -to-database users” query is set to run **every time**. With caching, there can be slight variations in when the report runs. So if you cache this report, depending on when the report runs and when the mailing gets sent, you may end up targeting the same users as the previous day, or missing users that should have been targeted.

On the targeting page, select the “New -to-database users” query and enter the number “1” to target people who were new as of yesterday. To make sure people don’t receive our mailing multiple times, we can exclude everyone who’s received a mailing in this recurring series in the past 6 months by adding the “People who recently received a recurring series” query from the query library and entering “180 days”. *
*Note that you should add this exclude even if your targeting is limited to users who joined X days ago because a) slight variations in send time are expected for scheduled mailings and a few minutes of overlap can lead to double mailing; b) sometimes users join and rejoin in short periods, and you don’t want to send them the same welcome email in close succession. Although the latter is only relevant if you’re targeting on new_to_list, the former is an issue regardless so you should add this exclusion.
You can also set the number of days to 100,000 for the People who recently received a recurring series” query to exclude anyone who received this series ever.

In the example above, note that we put the value of recurring_schedule_id as 1; in general, we can check the IDs that correspond to each recurring mailing series on the page /admin/core/recurringmailingschedule/:
4. Save and continue to next step: Proof and send
On the Proof and Send screen, you can select the recurring series you created in the first step. Click “make recurring” below the blue “send” button, select your series, and click “save schedule and continue editing as Draft”.

You can also send yourself a proof on this screen.
Note that proofs are sent only if there are users that match the targeting. If nobody was new_to_database yesterday, you won’t receive a proof in your inbox. You can return to step 2 and temporarily change the targeting (e.g. enter your user_id in the Users box). Just remember to change it back after you view your proof!
5. Start the recurring mailing
Click the button to “start recurring mailing,” then confirm the send on the next screen.
Your mailing will send every day at the specified time to any users who joined in the past day.
READ NEXT:
How do I create the second mailing in my welcome email series?
How do I edit my welcome email?
How do I see a report showing the performance of the first recurring welcome series over time?