In a previous post on Customizing page styling, we explored how to add custom CSS code to your pages on a one-off basis.
In this post, we’ll explore how you can make one-off changes to the layout or functionality of your page using Javascript without affecting any of your other pages.
If you’ve found yourself wanting to add custom Javascript to a page to change how a page works (especially to use with ActionKit’s built-in A/B testing!), read on.
(One-time) Create a custom page field
Custom page fields allow you to change the layout or functionality of your pages on a page-by-page basis.
From the Pages tab, choose Other > Custom Page Fields from the sidebar. You’ll then be able to see any custom page fields you have already created.
Let’s add a new custom page field. This is something that you’ll set up once — and then you’ll be able to use it again and again on lots of pages.

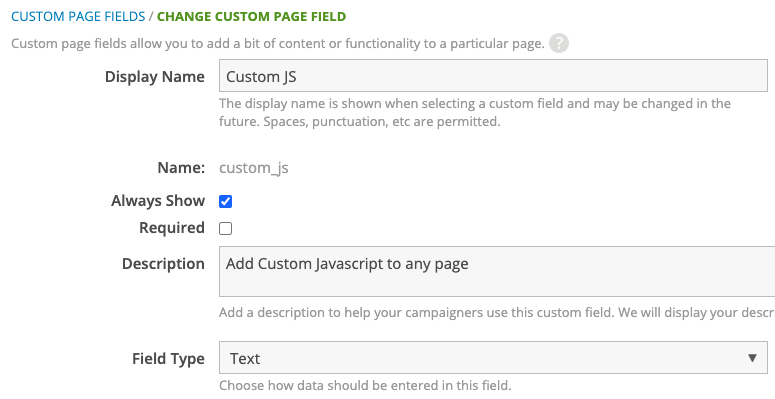
Here, we’ve created a custom page field with the name “Custom JS” and the description “Add Custom Javascript to any page.” We’ll use the “Text” field type.
(One-time) Add the custom page field to your templateset
Like creating a custom page field above, this is a one-time setup step that will help us to customize our pages easily once we’ve set it up.
Caution: Editing templatesets will change the look and feel of every page that uses that templateset, so when making changes to your templatesets, use the Preview feature and test lots of pages to make sure everything looks correct!
From the Pages tab, choose Appearance > Templatesets from the sidebar. You’ll then see all of the templatesets your organization is using.
Find the templateset you want to change and click Edit. You’ll see a list of all of the templates available. We want to make this custom page field available on every page, so scroll to the bottom and open wrapper.html.
Search for a closing </body> tag and add this code just above it:
<script type="text/javascript">
{% if page.custom_fields.custom_js %}
  {{ page.custom_fields.custom_js|safe }}
{% endif %}
</script>
Preview a handful of pages that use this templateset — they should look completely unchanged, since this code asks: “Does this page have anything in the custom page field custom_js? If so, add it in here!” But it won’t do anything until our page itself has something in the custom page field custom_js. We’ll cover that in the next step.
Once you’ve tested several pages and you’re confident that your changes to your templateset didn’t break any existing pages, go ahead and publish your changes.
Note: if you use multiple templatesets and want to add this functionality to each of them, repeat this step for each templateset.
Add the custom page field to your page
Unlike the other steps, this is one you’ll do on each page where you want to customize the functionality or layout.
We’ll use the post on Conditional Survey Questions here as an example since it’s a great illustration of a common thing you might want to do with Javascript on your pages.
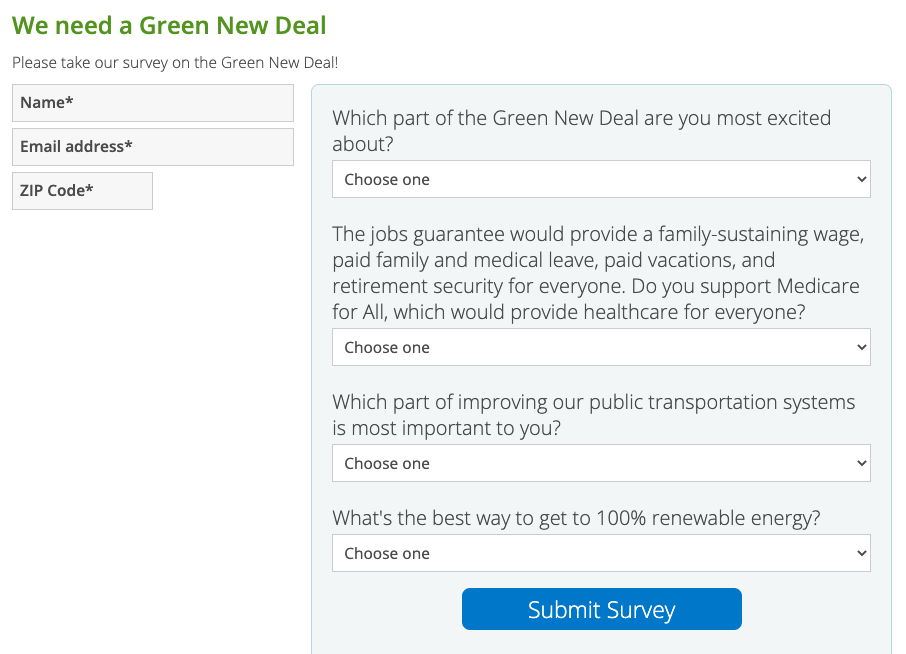
Let’s start with a survey page:

Notice that there are four survey questions we’ve written here. But what if we want to only show question 2, 3, or 4 based on your answer to the first question?
This is easy to do with Javascript, and now that we can add one-off Javascript code to our pages, let’s dive right in!
On the Action basics screen of your page, scroll to the bottom and expand the Custom Page Fields, then add the field Custom JS.

In this example, I’m adding the Javascript code from the blog post on using Conditional survey questions . (Read that post for full details about how to set this up)
This will hide questions 2, 3, and 4 — and only show them depending on my answer to the first question.
Once you save your changes, refresh the page and take another look.

This is just one example of how you can change the layout or functionality of your page by adding custom Javascript. Once you have this custom page field set up, there’s no limit to what you can do!
If you combine this with running A/B tests on your pages, you can A/B test any Javascript changes to see which layout and styling changes drive more actions and donations to your pages.
Interested in scheduling a demo with ActionKit? Let us know!
